November 29, 2011

Cheezy Eggplant Bake


Did everyone survive the first of many holiday celebrations? I feel like Thanksgiving is always the kick off for an entire month of get-togethers & celebrating. It's a tasty step in the direction of Christmas, which is my all time favorite holiday.

Our aunt made a delicious butternut squash lasagna for Thanksgiving dinner & then sent us home with the leftovers! (Thanks! We've enjoyed every bite!)  As we were eating lunch on Saturday, the Bup had a great idea for a variation on the lasagna using eggplant & a pumpkin cheese sauce.

A few weeks ago, we discovered Angela's super delicious & creamy sauce that's cheesy in taste but very healthy & light. It's like a dream come true. We've had it on pasta twice so far, but I've never experimented further.

If you're a little iffy about eggplant, this probably isn't the recipe to kick off your love of the veggie. The flavor comes through & really compliments the cheesiness. You could substitute cooked noodles for the eggplant if that's more your style. Just try the sauce. It tasted even better after it baked & we loved this dish with all of its flavors & textures.


Spread out about 1/3 of the sauce in the bottom of the pan. Look at how creamy it is! You'd never know by looking at it that it's full of healthy nutrients. The main healthy components are pumpkin & nutritional yeast. Nutritional yeast is a relatively new ingredient in my cooking life & it's fantastic. It creates a yummy cheese flavor without all the fat, cholesterol & calories, plus it's a great vegetarian source of vitamin B12.


Lay half of the eggplant slices on top of the sauce.


Sprinkle with mushrooms & onions. (No onions are in the pictured version.) I think it would also be good to add some chopped bell pepper or broccoli to the mixture, but I haven't tried that so I can't guarantee how the flavors would meld.


Top with another layer of sauce & sprinkle with garlic powder, black pepper & Italian seasoning.


Layer with the rest of the eggplant.


Top with the remaining sauce. At this point, you can go several directions. You can leave it as is or top with Italian seasoning. If you're feeling adventurous, sprinkle 1/3 cup of panko breadcrumbs on top for an added crunch.


After a short bake & broil, the top turns golden brown.


My favorite thing about this dish is how the creaminess of the sauce combines with the chew of the eggplant. It was filling & full of flavor without weighing me down - it was the perfect combo after all the Thanksgiving eating!


Cheezy Eggplant Bake
Serves 2

1 small eggplant (or 1/2 of a large eggplant), thinly sliced into rounds
6 white mushrooms, chopped
1 small onion, sliced
1/2 tsp. black pepper
1/2 tsp.garlic powder
1 tsp. Italian seasoning, divided
1/3 c panko breadcrumbs, optional
Pumpkin Mac 'n Cheeze Sauce

Preheat oven to 375*F. Spray a 5"x7" pan with cooking spray & set aside. In a small skillet over medium heat, saute mushrooms and onions until they soften & begin to sweat. Spread about a third of the pumpkin sauce over the bottom of the prepared pan. Lay half of the eggplant slices in a single layer to cover sauce. Spread mushroom & onion mixture over eggplant. Pour half of remaining pumpkin sauce over the mixture. Sprinkle with black pepper, garlic powder, & 1/2 tsp. of Italian seasoning. Place remaining eggplant slices in a single layer on top of sauce & seasonings. Top with the rest of the pumpkin sauce & sprinkle with 1/2 tsp. Italian seasoning & panko breadcrumbs, if desired. Cover with aluminum foil. Bake for 15 minutes. Remove aluminum foil & bake for 20 minutes more. Place under broiler for 3-5 minutes to lightly brown the top, watching closely so that it does not burn. Let stand for 5 minutes before slicing. Serve hot.

Note: Once you assemble the dish, it can be stored in the refrigerator until you are ready to bake it. Do not place a cold glass pan into a preheated oven! If you are going straight from refrigerator to oven, place pan in oven to slowly warm while the oven is coming up to temperature. Once the oven comes to 375*F, then bake for 15 minutes before removing the foil.


November 26, 2011

Honey Mustard & Onion Potato Wedges


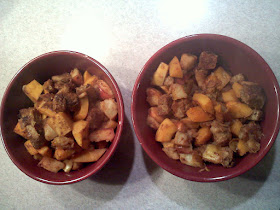
Did you get your fill of potaotes on Thanksgiving? Don't worry. These taste nothing like what you had. They aren't mashed. They don't have butter in them. Instead, they're crispy & flavorful!

You know those pretzel pieces from Snyders of Hanover? The really addicting honey mustard & onion ones? That's what these taste like. Except they're made with just a few ingredients instead of a zillion.


Chop up your potatoes into wedges. You don't have to bother with peeling. Didn't you do enough of that for all those mashed potatoes? Plus, the skins are where the good nutrients are!


Stir them up with the honey mustard marinade & lay in a single layer on a baking tray.


I threw in a bell pepper for color & a flavor kick, but it's not necessary. They're yummy with or without it! Enjoy!


Honey Mustard & Onion Potato Wedges
Serves 4

6 medium potatoes
1 medium onion
1 red bell pepper (optional)
1 1/2 T honey
2 tsp. Dijon mustard
1/2 tsp. turmeric
1 tsp. onion powder
1 tsp. mustard powder
1/2-1 tsp. salt, to taste
1 tsp. dried minced onion

Preheat oven to 375*F. Coat a large baking sheet with cooking spray. Scrub potatoes and slice into wedges, keeping a uniform size. Chop onion and pepper (if using) into chunks the same size as potatoes. Combine in a large bowl. Whisk together honey, Dijon mustard, turmeric, onion powder, mustard powder, and salt. Pour over potato mixture and stir to coat. Arrange pototo mixture on baking sheet in a single layer. Lightly spray mixture with cooking spray. Sprinkle with dried minced onion. Bake for 20 minutes. Stir to loosen from sheet and then bake for another 25-30 minutes. Potatoes are done when they are lightly browned and crispy. Serve hot!

November 24, 2011

I'm Full of It


For having plenty of food on the table.

For friends who care.

For family that loves me.

For knowing a loving God, who has truly blessed me.

For hair-ties & ponytails.

For everyone who reads this blog.

For being able to walk.

For having a warm house.

For the lettuce & kale that are still growing in my garden.

For plenty of sweaters & blankets in my closets.

For having a job & the ability to work.

For freshly popped popcorn.

For a wonderful husband who treats me like gold.

For thick, fuzzy, snuggly socks.

For forests & hiking.

For lotion to soothe my perpetually dry skin.

For the time & the ability to read a book.

For chocolate.

For peanut butter.

For the person who decided to combine chocolate & peanut butter.

For clean water to drink.

For happiness.


Happy Thanksgiving everyone!


November 23, 2011

Cranberry, Beet & Pear Salad


I'm in a festive mood! I'm so ready for the upcoming holidays & everything they include. I love all of the family & friend time, yummy foods, decorating, gift wrapping/giving, & general excitement!

As we go into the holidays, I'm trying to keep our dinners healthy, light, & full of nutrients. With the weather getting cooler, it's so tempting to cozy up by the fireplace in the evenings & become a lot less active. The chilly weather also makes people much more susceptible to diseases, so I want to make sure we're fueling our bodies with lots of healthy foods.

Our oven has been on almost every night. Something about this dreary weather makes me crave warm foods. I may or may not also want to use the oven because it warms up the kitchen. I always leave the door open after I turn it off to let all the heat into the room. :-)


You're looking at our entire beet crop. I planted 2 rows! :-( They just didn't get big. It took me forever to clean these because they were all about the size of a vitamin. There were only about 4 or 5 that made it to ping pong ball size. Still, they tasted the same! I'm thankful to have gotten any at all.

I love the way beets color everything around them. Cranberries do the same thing, so this made a really pretty medley. The onion wedges turned a pinkish purple after they were done baking. 


Maybe this looks more like Christmas than Thanksgiving...

The cranberries add a lightly tart flavor to the salad. Combined with the crunch of the hazelnuts & the sweetness of the beets & pears, this salad was warming & fresh at the same time.


Cranberry, Beet & Pear Salad
Yield: 2 main dish salads or 4 side salads

4 large beets
1 medium white onion
1/2 c fresh cranberries
1 T balsamic vinegar
1/4 tsp. black pepper
4-5 c lettuce mixture (romaine, red leaf, spinach, radicchio, etc.)
2 pears
1/3 c roasted hazelnuts
1/3 c Cranberry Dressing (see below)

Preheat oven to 400*F. Spray a baking sheet with olive oil cooking spray. Cut beets and onion into uniform wedges. In a medium bowl, combine beet wedges, balsamic vinegar, and pepper. Arrange on baking sheet in a single layer. Bake for 20 minutes, stirring once. Add onion wedges and cranberries, mixing with beets. Bake another 25-30 minutes, stirring occasionally to keep from sticking.

In the meantime, divide lettuce between two (or four) bowls. Thinly slice pears and arrange on top. Once beet mixture is done roasting, divide between salads as desired. There may be some extra - this will keep in the fridge for 3-4 days and can be reheated. Top salads with hazelnuts and Cranberry Dressing.

Note: If you don't feel like making the Cranberry Dressing, you can still make this salad! There are cranberry dressings available in some stores, or you could substitute either Raspberry Vinaigrette or Balsamic Vinaigrette.

Cranberry Dressing
Yield: 1 1/2 cups

1 c fresh cranberries
1/2 of a pear, roughly chopped
1/2 of an apple, roughly chopped
1/4 red onion, roughly chopped
1/2 jalapeno, chopped & seeded
1/4 c apple cider vinegar
2 T lime juice
3 T orange juice
2 T honey
1 tsp. Dijon mustard
1 T dried cilantro (or 1/4 c fresh cilantro)
1/2 teaspoon salt
1/4 tsp black pepper

Combine everything in a food processor or high speed blender and blend until smooth. Taste & add more honey or salt if desired. Store remaining dressing in an airtight container in the refrigerator.

November 21, 2011

Yummy Thanksgiving Dinner Ideas

Fall Leaves


It's almost Thanksgiving!!! Is everyone done putting together their menus & shopping for food? I'm not hosting dinner, but I am bringing a few dishes to our dinners. We're having lunch with the Bup's family & dinner with mine. Talk about a lot of food & family! We did this 2 years ago, though, & it really wasn't that bad.

Since the main focus of both of our families' meals is the turkey, I'm bringing an alternate dish for us to eat & share. I'm also bringing a pumpkin roll to lunch. Everyone always gets excited for it!
Thanksgiving meals have never been my favorite. I think it's partly because the dessert table never has much chocolate on it! That said, I still get really excited about all the fall harvest flavors.

If someone offered to cook me the Thanksgiving meal of my dreams, here's what I'd pick. Lots of bloggers have been showcasing foods for the holidays, & here are my favorites! Just in case you're in the mood to cook for me. :-)

Main Dish:  Pumpkin Maple Baked Bean Cornbread Casserole from Oh She Glows
(This is what I'm planning to make & share!)


Vegetable:  Roasted Brussels Sprouts with Apples & Almonds from Happy Healthy Mama
(I'm a sucker for roasted brussels sprouts. Her additions look very festive.)

Stuffing:  Carmelized Autumn Fruit Stuffing Cups from How Sweet Eats
(pictured above - we had this for dinner last week & it was SO good!)

Salad:  Bliss Salad or End of Summer Salad from Peas and Thank You
(We had the Bliss Salad a few weeks ago & it was good enough to have again)
                             or
            Holiday Salad with Cranberry Apple Orange Vinaigrette from Oh She Glows
(This looks super festive. I love the color of the vinaigrette!)


Bread:  Flaky Crescent Rolls from Eat Live Run
(I always loved the ones from the can. These look way better!)
                              or
           Banana Cranberry Bread from Joy the Baker
(Can I just have both breads? Thanks!)


Potatoes:  High Protein Garlic Mashed Potatoes from Oh She Glows
(Anytime someone puts garlic into mashed potatoes, I'm in love. The beans are a great addition, too!)
                                 or
                Baked Curry Sweet Potato Fries from Joy the Baker
(The sweet potato fries remind me of the grilled ones I made over the summer. Thanksgiving isn't really the time for grilling, though!)


Cranberry Sauce:  Cranberry Pear Salsa from How Sweet Eats
(We tried this over the weekend. Yum!!)

Dessert: Upsidedown Cranberry Cake from Smitten Kitchen
(This is seriously delicious. I made it last year & can't wait to have it again. I think I'd double the cranberries.)
                               or
No-Bake Chocolate Pumpkin Pie from Chocolate Covered Katie
(Finally, some chocolate!)


Is anyone interested in enjoying a Thanksgiving feast with me? We can do a potluck! :-)

I'm making my list of what I'm thankful for to share with you. What are you thankful for this year?

November 20, 2011

Apple Pumpkin Beer Bread


Fall is slowly winding down. Daylight savings has come & gone, so now it's dark in both the morning & evening. This makes me want to curl up on the couch with a blanket & a mug of hot tea every.single.night. Not good. Especially when things like meetings & life get in the way.

You're probably ready for me to let go of fall, since I've been talking about it for months now, but I'm trying to hang on a little big longer.

This bread, with its fall flavors of pumpkin, apple, & spices helped just a bit. It's sweet enough to be dessert, but healthy enough for breakfast. Or as a mid-day snack to tide me over until dinner.


Start by mixing up the dry stuff, complete with lots of warming spices! Depending on how spiced the pumpkin beer you use is, you may want to reduce or increase the spices. I used Post Road Pumpkin Ale, which is slightly spiced but not over the top.


Chop up the apples & stir together the wet ingredients. There will be leftover beer, but don't worry about that. I'm sure you'll find a good place for it. ;-)


Pour the wet ingredients in with the dry and mix away.


Then add the apple chunks, stirring just until they're combined. Don't over stir.


Pour the batter into a loaf pan. I put a baking sheet under my loaf pan while baking, just in case, and it did catch a few drippings of batter. I wanted a nice big loaf, so I didn't want to cut back on the ingredients, but I also didn't want to have to clean the oven!


Once it cools, you can slice it up & enjoy!

The chunks of apple cooked into little pockets of sweetness, complimenting the spiced bread. Each bite has all the fall flavors, kicked up a notch with the slight hint of beer. I hope you enjoy it!


Apple Pumpkin Beer Bread
Yield: 12 slices

2 1/2 c white whole wheat flour
1/4 c ground flax
1/4 c toasted wheat germ
2 tsp. baking powder
2 tsp. baking soda
1 tsp. salt
2 tsp. cinnamon
1 tsp. ginger
pinch nutmeg
2 c chopped apples
1/4 c coconut oil, melted
1/2 c pumpkin puree
3/4 c agave nectar or maple syrup
3/4 c pumpkin beer
1 T vanilla

Preheat oven to 350*F. Spray a glass loaf pan with cooking spray. In a large bowl, combine white whole wheat flour, flax, wheat germ, baking powder, baking soda, salt, cinnamon, ginger and nutmeg.  In a separate bowl, mix together coconut oil, pumpkin, agave nectar, pumpkin beer and vanilla. Add wet ingredients to dry and stir until no dry ingredients remain. Add apples and stir just until combined. Pour into prepared loaf pan. Bake for 55-65 minutes or until a toothpick inserted in the middle comes out clean. Cook in pan 10 minutes. Invert onto a cooling rack and cool completely before slicing.


November 15, 2011

How To: Roasted Chestnuts


Have any of you actually eaten a roasted chestnut? There's The Christmas Song (aka Chestnuts Roasting on an Open Fire) about them that we hear every year, but for the majority of my life, that was all I knew about them.

Turns out, they're delicious! As an added bonus, they automatically make your house smell like the holidays!


My in-laws have a chestnut tree in their backyard & this is the second year that they shared the nuts with us. It's probably the last year, too, as the fall snow storm severely damaged the tree.

It's not hard to roast the chestnuts at all. If you know anyone with a tree, it's practically free, but even if you don't, they aren't overly expensive to buy, either.

First, you score each chestnut with an X. You want to cut the skin all the way through so that they're easier to peel. Last year, I just barely cut them & it took me forever to get them open. This time, I cut them with scissors - push the tips into the side of the chestnut & close the blades, then repeat to form an X. Unless you're trying to have perfect, whole chestnuts, it's okay to cut into the meat. You'll see a white X on the roasted nut later, but it doesn't change the taste.

They bake in the oven for about 30 minutes & make the house smell delicious!


As soon as they come out & cool enough to handle, it's time to peel them. While they are still warm, the nut is pliable so you can squeeze the shell to break them open at the X's. As they start to cool, you'll notice that peeling them gets a lot harder. If they cool too much, just stick them back in the oven for about 10 minutes to warm up again.

Ta-da! A big bowl of roasted chestnuts to enjoy!

Roasted Chestnuts

1 lb. chestnuts (or as many as desired)

Preheat oven to 350*F. Use scissors to score chestnuts with an X, making sure to cut all the way through the outer skin. Be cautious as to not cut yourself. Lay chestnuts in a single layer on baking sheets (use as many as needed for the amount of chestnuts you have). Bake for 30-35 minutes or until the outer skin peels back around the X. Remove from oven & let cool briefly. As soon as the chestnuts are cool enough to handle, peel off the outer skin. Store chestnuts in a loosely covered container (not air-tight) for up to 2 weeks at room temperature. They can be frozen in a freezer bag for future use for up to 1 year.

Note if you are using naturally grown chestnuts: as you score them, check for little holes. If they have holes, they have worms, so just get rid of them right away. After you bake them, there may still be a few duds, so if you see one that's black or white or just looks a little off, don't eat it. Better safe than sorry!


November 14, 2011

Veggies & Amaranth


This weekend we tried some new foods.

I'm always looking for more ways to eat veggies & for grains with great nutritional value.

To start with, I made amaranth for the second time ever. The first time, I popped it to eat as cereal & stunk up the whole house by burning the first 3 batches. This time, I decided to go the safer route & boil it in water. It turned out with a similar consistency to polenta & without any overwhelming flavor, making it a nice blank slate for any flavoring I chose to add.

Amaranth is an ancient grain that has tons of health benefits. It's gluten-free, high in protein & is full of vitamins A & C, folate, thiamine, niacin, calcium, zinc, manganese, iron, & more. It was also very filling. We worked in the garden all afternoon after our lunch & I didn't get hungry!


I'm usually a fresh veggie person, so this was something new for me. I remember as a teen I always wanted those single frozen packs of broccoli with cheese sauce. They weren't even good! Some of the broccoli would heat up to the point of mush and the rest would be ice cold. Not to mention all those weird ingredients.

Frozen veggies that you can cook in their package have come a long way since then. I tried Green Giant Steamers for the first time when the Foodbuzz Tastemaker progam offered me the opportunity. This was my first time trying anything similar to this, & I really didn't know what to expect. The ingredient list is just ok - it's mostly the veggies (mine had potatoes, sugar snap peas & red peppers) with 1% of a bunch of stuff including herbs. All of the veggies were heated completely through without being mushy, but the pepper did get slightly softer than I like them.

 It was a great mix for a quick & easy lunch, although I wouldn't rely on these for every day. I still prefer my fresh veggies & to season them myself.

The amaranth & veggie mixture went very well together & wound up being much more filling than I expected. Great for a quick lunch when you're short on time or just super hungry!


Veggies & Amaranth
Serves 2

This is a tasty & quick 20 minute lunch that is nutritious, filling, & requires minimal cleanup!

1 c amaranth
2 1/2 c water
1 package Green Giant Steamers or other frozen veggies in light sauce

In a medium pot, bring amaranth and water to a boil. Simmer for 18-20 minutes. In the meantime, prepare vegetables according to package directions. Spoon 3/4-1 cup of cooked amaranth into a bowl & top with half of the vegetable mixture. There will be leftover amaranth, which can be stored in an airtight container in the refrigerator for 3-4 days.*

*I ate leftover amaranth mixed with banana and apple chunks, a heavy sprinkling of cinnamon, and almond milk for breakfast the next day.

November 12, 2011

Pepper-only Pizza


We did fall pizza night in style.

Pumpkin ale? Check! Leaf plates? Check! Linens leaf napkins? Check!

I pulled our frostbiten pepper plants last weekend & in the process got 3 baskets of bell peppers. Yikes! That meant we'd get to put lots of peppers on our pizza. Hence, "pepper-only" pizza. Get it? We like dumb vegetarian jokes, okay??

It's Saturday, you should have pizza. You've have a long week. It'll feel like an indulgence but you'll pack in the veggies, too.

First, I made Alex's Ultimate Pizza Crust. If you like thin & crispy crusts, this is for you!


Once you have the crust, you can top it any way you like, but here's what we did:

Spread a layer of bbq sauce on one & minced garlic, olive oil & tomatoes on the other.

Then throw on lots of chopped onions!

Top it with LOTS of peppers, any color you like.

Add a generous sprinkle each of Italian seasoning, garlic powder, & basil for extra flavor.

Toss on several handfuls of swiss chard for some extra greens.

Bake at 400*F for 15 minutes.

Add a sprinkle of mozzerella cheese, but not a super thick layer. Let the veggies shine!

Bake another 7-9 minutes until slightly browned.

Slice & enjoy with linen napkins & beer.

Classy.


November 10, 2011

It's Bazaar!


This past weekend our church hosted its annual bazaar. It was very successful & we had a lot of fun spending the day with fellow church members while working in the kitchen.

The food doesn't vary too much from year to year, with the hits being homemade chicken pot pie, pulled pork sandwiches, hot dogs & very spicy chili. That doesn't leave much for a vegetarian to eat!


Last year, another church member made a huge pot of vegetarian chili & it sold pretty well. This year, I thought I'd make a vegetarian dish, too. When it comes to veg dishes to please a crowd, Mama Pea's blog is always the first place I turn. Since the bazaar menu has several meat based sandwiches, I decided to do a vegetarian sandwich - the Sloppy Josephine!

While I only sold about 9 sandwiches, I was happy to have this to offer. I had fun making them, the Bup & I had a great lunch, & it was a new food for people to try. Everyone that I convinced to try a bite loved it! One church member even said, "Oh! I didn't expect this to have so much flavor!" I'm glad I could share that vegetarian eating doesn't have to be bland or boring.

Thanks for the recipe, Mama Pea! I've shared the link with several people who requested it.

For a few hours, the Bup worked the order desk. Everytime someone asked for a bbq sandwich, he'd say, "The vegetarian one, correct?" :-)  Most people looked at him like he was nuts, but I love that he asked that. There were a few takers! The lady working with him bought one just to see what he was raving about.


I was stationed in the corner next to the big pots of pot pie. I love the hustle & bustle of the busy kitchen. I'd love to eat it if they'd leave out the chicken...


Dad, over in the spicy chili corner, was cutting up onions. Lots of onions.


They were for Italian sausage sandwiches. The sauce is in the far left crockpot. Next to that is the vegetarian chili, and then the bread-maker for fresh coconut-craisin wheat bread to sell at the bake sale.


I made cake pops! Some were chocolate-chocolate & some were chocolate-peanut butter. Yum! There were only about 8 left by the end of Friday, & they were hoping to sell all the remaining goodies on Saturday morning.

We had a great turnout! There were tons of craft vendors, a silent auction, bake sale, & our annual Granny's Attic rummage sale.

Can't wait till next year. Maybe I'll introduce another vegetarian option!


November 8, 2011

Tasting Sabra Roasted Pine Nut Hummus


As you're probably well aware by now, I love hummus.


It's November, a month that's often devoted to being thankful, & I'm thankful for hummus!

I only started eating it a few years ago, but now we have a container in our fridge almost all the time. It's good on everything! We use it to dip veggies, in sandwiches, on chips & bread, & anywhere else we can. 


Since it's pretty expensive & we consume so much of it, I make my own. Sometimes it's great, sometimes it's just so-so, but we always eat every last bit.

When the Foodbuzz Tastemaker program offered to send me a coupon for Sabra hummus, I got super excited! I like to try new flavors & it's always a treat to not need to wash the food processor for the zillionth time.

I chose the Roasted Pine Nut Hummus because it's a flavor I'll probably never make at home. Pine nuts are expensive! This hummus is super creamy, with hints of pine nut flavor, but not overwhelming. The ingredient list is pretty short, & I recognize everything on it.

While I considered making something with the hummus, I wanted to sample it by itself first, to get the full flavor profile. I don't think it's going to make it into any recipes before we devour it. Yum!!