Showing posts with label nuts. Show all posts

February 27, 2013

Gnocchi with Roasted Broccoli & Garlic Vinaigrette


This is one of our favorite meals! We first had it last fall, and then I mentioned it briefly in December. At some point, we also made it for my parents, who loved it, too.

The original inspiration came from a newspaper clipping of a recipe for Roasted Broccoli. It was meant to be a side dish, but I thought it sounded like a great way to serve pasta.


I made a few changes (as usual!) & paired it with a bag of frozen gnocchi, making it a quick & flavorful dinner. It's filling but not heavy, which I think is often the problem with gnocchi. Most times, it's topped with a creamy sauce & the pasta itself is already so creamy that it really weighs you down.

The bright flavors of the red wine vinegar, the creamy gnocchi, & the earthy walnuts really come together well. It's a melt in your mouth flavor burst! :-)

I hope you try it out!


Gnocchi with Roasted Broccoli & Garlic Vinaigrette
Serves 2-4

4 T red wine vinegar
1 T lemon juice
2 T extra virgin olive oil
2 cloves garlic, mashed into puree or microplaned
1/2 tsp. black pepper
1/4 tsp. crushed red pepper flakes
1 tsp. salt
1 large or 2 small heads broccoli, chopped
1/3 c walnuts, chopped
1 bag frozen gnocchi
2 oz. parmesan cheese, freshly grated + more for serving

Preheat oven to 450 degrees. Spread broccoli pieces on a large baking pan sprayed with cooking spray and roast for 20 minutes. Stir and return to oven for 20 minutes. Stir again, add walnuts, and roast another 5 minutes.

In the meantime, bring a large pot of water to a boil and prepare gnocchi according to package directions.

Mix together vinegar, lemon juice, olive oil, garlic, both peppers, and salt. Set aside until broccoli and gnocchi are finished cooking.

Toss together roasted broccoli and walnuts, cooked gnocchi, and dressing in a large bowl. Top with cheese and stir briefly to combine. Sprinkle with additional cheese if desired. Serve immediately.

January 29, 2013

Buckwheat Pesto Salad


This stuff is delicious! It's my first experience with using buckwheat in a savory dish & I'll definitely be using it more in the future. Cooked whole buckwheat groats have a consistancy similar to rice, with the slight chew, & it has a nuttier of flavor.

I first discovered buckwheat groats through another blog I read, Edible Perspective. Ashley introduced me to Buckwheat Bakes (like this Zucchini Bread Buckwheat Bake) as a breakfast item & I really like them! They're very filling & last me through the morning without hunger pains.

When I started making the bakes, I needed to purchase raw buckwheat groats. They were not available in our local stores, so I bought a multi-pack box from Amazon.com. That was best price I found & I knew I'd use them all! The basis for this recipe was on the back of the Bob's Red Mill bag.

Buckwheat is a fairly uncommon food to cook with. It's a little misleading, because while it has "wheat" in the name, it's actually not wheat at all. It's gluten-free, in fact! Even though it's used like a grain, it's actually a seed. It's also high in protein, manganese, magnesium & fiber. Lots of healthy goodness here!

We'll be enjoying this alongside leftovers or with a big salad. I hope you try it!


Buckwheat Pesto Salad
Adapted from Bob's Red Mill
Serves 6-8

1 c Buckwheat Groats
2-1/2 c water
1/4 tsp. sea salt
1 T extra virgin olive oil
1 Batch Parsley Walnut Pesto
4 cloves garlic
1/4 c fresh basil
1/2 c chopped Walnuts
1 c freshley grated Parmesan cheese
 
In a medium saucpan, bring water and salt to a boil. Add buckwheat groats, cover, and allow to simmer for 20 minutes. Remove the pan from stove and leave covered for 5 minutes. Remove lid & fluff with fork.
 
In the meantime, make your parsley walnut pesto. Clean out the food processor and pulse the garlic cloves a few times to chop. Add basil & pulse again until it is chopped and mixed with the garlic.
 
Mix olive oil, parsley pesto, and the garlic-basil together. Stir this into the cooked buckwheat groats. Add walnuts and parmesan cheese. Salt to taste, if needed. Serve warm, or refrigerate in a sealed container & serve cold. It's great both ways!

January 8, 2013

Parsley Walnut Pesto


You know how sometimes you find a recipe that calls for fresh herbs, so you buy some, but then you have a whole bunch leftover?

This pesto is a great solution for that! I had a bunch of parsley leftover from a quinoa salad I made & I didn't want it to go to waste. This pesto recipe is perfect for small amounts of herbs. So many pestos call for 2-3 cups of a fresh herb & I rarely have that much on hand. You could also use this recipe with a different herb, like basil or cilantro for a different flavor.

While this doesn't make a large quantity of pesto (only about 1/2 cup), it's just the right amount to use on a pizza, as a sandwich spread, or mixed with pasta for 2. Plus, it's yummy & full of flavor & healthy fats!


Parsley Walnut Pesto
Yield: 1/2 cup

1 c parsley, washed & de-stemmed
1/4 c walnuts
2 T lemon juice
2 T extra virgin olive oil
1/8 tsp. salt

Combine all ingredients in a small food processor & process until mostly smooth. You may have to stop a few times to scrape down the sides. Store in an airtight container in the fridge until ready to use (no more than a week). Pesto can also be frozen, either in one container or in small batches in an ice cube tray (once frozen, remove from tray and seal in a freezer bag).

October 29, 2012

Cherry Walnut Chocolate Chip Oatmeal Cookies


The best thing to do during a big storm is bake cookies! The warmth of the oven, plus the comforting smell of them baking, makes for a cozy afternoon.


These cookies are full of natural, healthy ingredients. Spelt flour, oats, cinnamon, cherries, & walnuts all add health benefits. Everyone loves eating a cookie & still feeling like they put something healthy into their body!


Enjoy & stay dry. My thoughts & prayers are with everyone as Hurricane Sandy comes through!


Cherry Walnut Chocolate Chip Oatmeal Cookies
Adapted from Cooking Light
Makes 32-34 cookies

2/3 c (3 oz) spelt flour (or sub white whole wheat flour)
1 1/2 c old-fashioned oats
1 tsp. baking soda
1/2 tsp. salt
1/2 tsp. ground cinnamon
6 T organic butter
2/3 c sucant
1 tsp. vanilla
1 organic egg
1/2 c dried cherries (or sub raisins or dried cranberries)
1/2 c chopped walnuts
1/3 c semi-sweet chocolate chips


  1. Preheat oven to 350°. Mix together flour, oats, baking soda & salt in the bowl of a mixer. Stir to combine.
Melt butter in a small saucepan over low heat. Once melted, watch closely until butter begins to brown. Remove browned butter from heat & add sucanat. Add to flour mixture and beat at medium speed until combined. Add vanilla and egg; beat until blended. Fold in cherries, walnuts, & chocolate. 

Drop dough by tablespoonfuls onto baking sheets. Cookies will only spread slightly. Bake for 12 minutes, then remove from oven & cool on pans for 3 minutes before removing. Finish cooling on wire racks.


July 11, 2012

Peach, Walnut & Roasted Beet Salad


I'm going to be the master of the obvious here & tell you that it's been hot lately. Super hot. That means I'm less motivated to make heavy dinners & really into anything I don't have to actually cook.

Of course, I have turned the oven on a few times. I had to roast the beets for this salad, for example. But I made it worthwhile by making Hot Chocolate Cookies at the same time! It was a win-win situation. Then I stored the beets in the fridge so they were ready for me to put on salads throughout the week.

I was super excited to pull my beets. We thinned them a few weeks ago & I got just enough to have for one meal. Last weekend we pulled the rest (I was sweating like crazy out there!). There were 4 that had some surface damage, so I cleaned those right away & roasted the good parts.


I wasn't sure whether we'd just toss them on salads or if I'd do something special with them, but I came across a recipe on the Whole Foods site that was just begging to have them on it. We ate outside for the first time in weeks, happy to enjoy the fresh air & the crisp flavors.

I hope you're staying cool. We usually go for a nice bike ride on Saturday mornings, but this week we cut it short to 4 miles. It was too hot! We stopped at the producers-only farm market on the way home & got lettuce, peaches, corn on the cob, & zucchini. I can't wait to see what they have to offer next weekend!


Peach, Walnut & Roasted Beet Salad
Inspired & Adapted from Whole Foods
Serves 2 as the main course or 4 as side salads

Dressing:
1/4 c walnuts, toasted
1 large peach, chopped
2 T lime juice (or more to taste)

Salad:
1/2 head green leaf lettuce, washed & torn into pieces
1/2 head red leaf lettuce, washed & torn into pieces
1 peach, sliced
2 radishes, thinly sliced
1/2 cucumber, thinly sliced
2 beets, roasted - follow these instructions, just use only red beets - can be done ahead of time
Blend dressing ingredients in a food processor or high-powered blender until smooth. Store in an airtight container in the refrigerator until ready to use.

Divide lettuces evenly between bowls/plates. Top with remaining ingredients, divided evenly. Drizzle with dressing & serve immediately. Alternatively, serve with dressing on the side & allow each person to add their own, to taste. (We didn't use all of the dressing for our 2 salads. There was enough left for at least 1 more salad.)
Notes:
- Beets can be roasted a day or two before making the salad. Store in the refrigerator.
- Dressing will keep for about 4 days. You can make it ahead of time & store in the refrigerator. This is good to do if you like your dressing cold because if you make it fresh it will be warm or room temperature.
1/4 c walnuts, toasted

June 9, 2012

Millet & Oat Granola


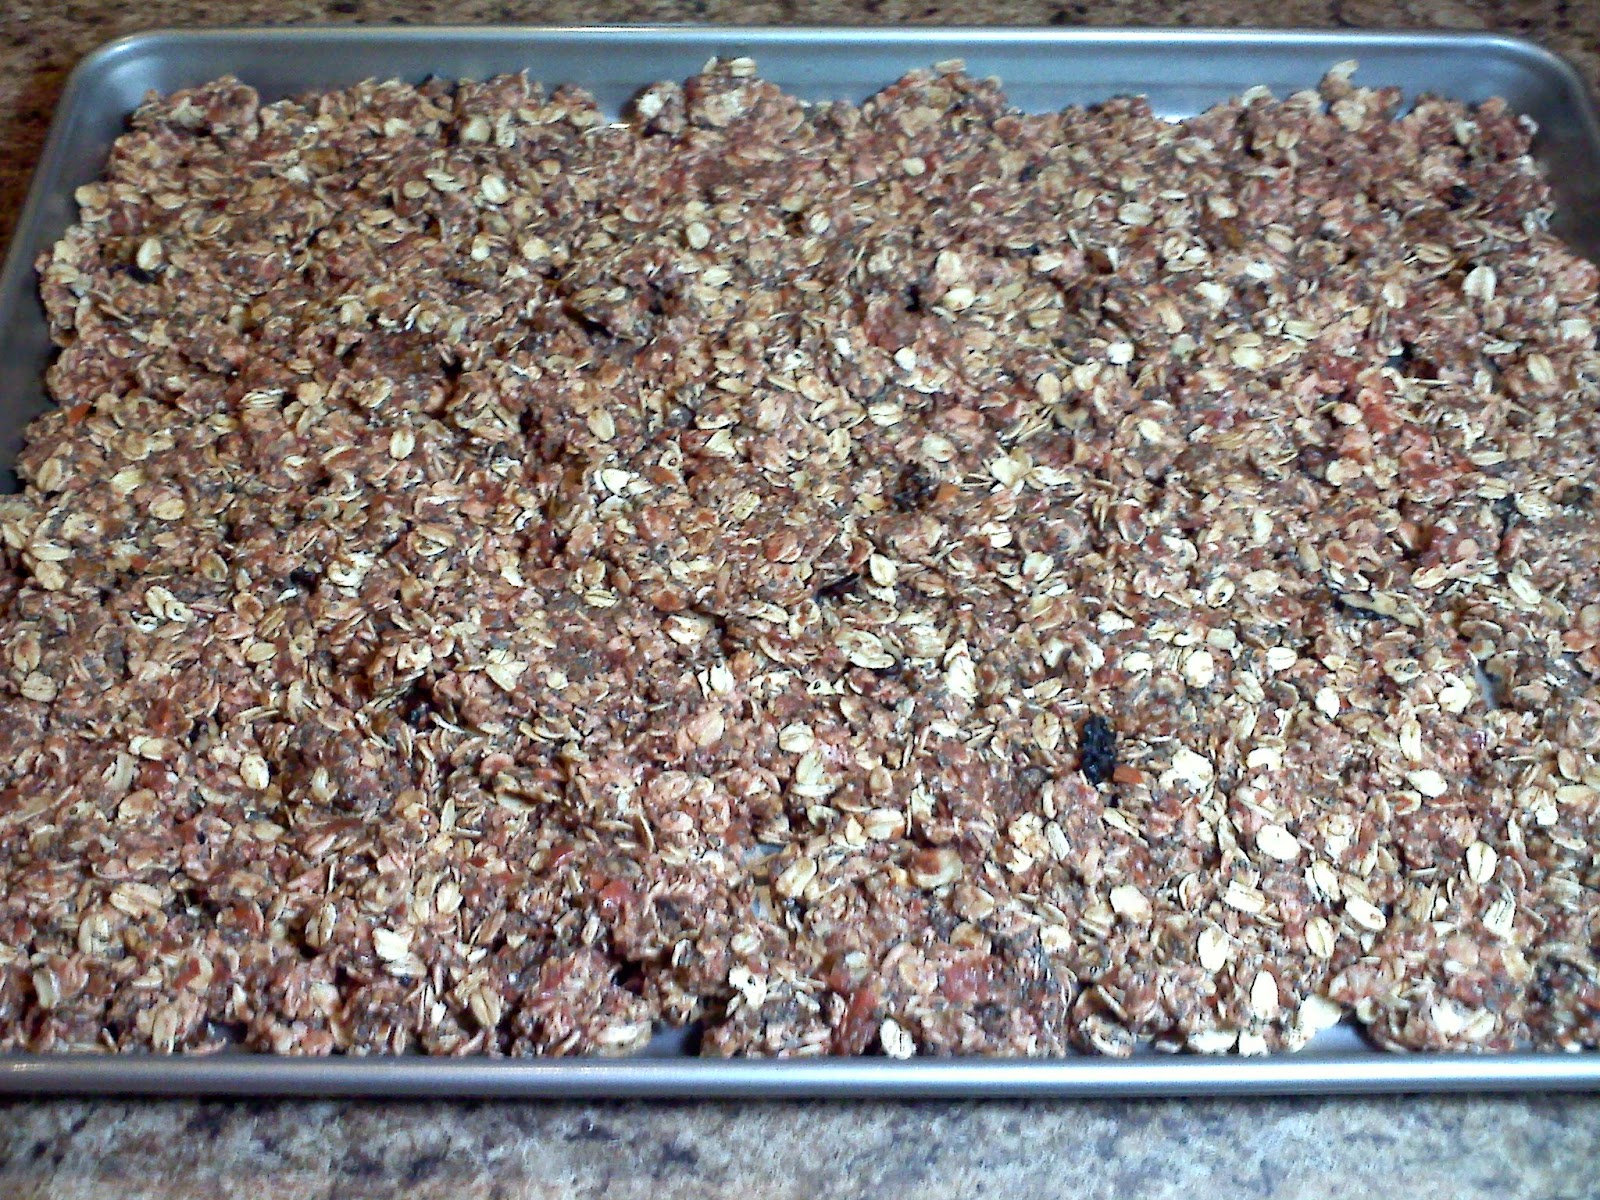
We've been in the mood for granola lately. With all the fresh strawberries we have, it's the perfect combination!

Due to all of the horrors of the dairy industry, I buy organic yogurt. We've tried & enjoyed a variety of yogurts from Stonyfield, but our new favorite is a raw milk yogurt from our local real food emporium.

Now I have to take a moment & do a little plug for this emporium. I'll be the first to admit that some of their products are pricey. It's a small, local store, & it's a matter of business fact that they are going to have to charge more than the super stores.

But where else are you going to get to the register with your $15, only to have your bill total $15.75, & have the owner tell you to just bring the 75 cents next week? We were prepared to put one of the items we wanted back on the shelves, but he said no need, you can owe us. SO NICE!

We also love the Bee's Juice Bar that's in the emporium. The fresh juices are fantastic. I can't wait to try the vegan ice cream on one of our visits. It sounds so good!


So this granola...it's crunchy, it's low in fat, & it's delicious. Granola is very flexible, so if you don't have puffed millet, you could use puffed rice or more oats. Sub another nut for the walnuts. Use almond butter instead of peanut butter. It'll still be delicious, I promise.


Millet & Oat Granola
Adapted from Chocolate & Toast

4 c rolled oats
2 c puffed millet cereal (like this from Arrowhead Mills)
1 c flaked coconut
1 c raw walnuts, chopped
1/2 c ground flax seed
1 c applesauce
2 T maple syrup
2 T honey
3 T natural peanut butter
1 tsp. vanilla
1 T cinnamon
1/2 tsp salt

Mix the first 5 ingredients together in a large bowl.  Combine the remaining ingredients and pour over dry ingredients. Mix well.  Using either 1 very large baking pan or 2 smaller ones, spread mixture in an even layer.  Bake at 325 for approximately 1 hour. Every 15 to 20 minutes, remove granola from the oven and give it a stir. Granola will continue to crisp once you finish baking it, so keep that in mind when gauging how done it is.

Once granola reaches your desired level of crunch, allow it to cool completely. Store in an airtight container.


May 2, 2012

Happy Day Walnut Cake


I'm a bit of a cake snob.

It took me about 25 years to realize it, but it's true.

When we go out to eat, I always get excited about the dessert tray. Most times, my eyes are drawn to the chocolate cake, always so dark & covered in plenty of frosting, but when I get it, it rarely lives up to my expectations. It's always either too dry, not chocolatey enough, or just mediocre all around. So now, I try to remember that & order something different. Or just go for ice cream. That's always a safe bet.


This cake ranks in the "something different" category. The walnut cake recipe is a traditional one that my mom gave me from her recipe cards. I believe she got it from her mom, who got it from hers, etc., so I'm not sure of the origin. I just know it's good! Mommom always served it with a fluffy white frosting & stored it in her silver cake carrier.

I found an identical carrier at our church rummage sale & just had to buy it. I love using it because it always reminds me of Mommom's cakes.


Poppop's birthday (85 years!) was on Saturday, so Mom invited my grandparents & us over for dinner on Sunday to celebrate. I offered to make the cake, & Mom said he loves walnut cake, so she shared the recipe. I'm not a fan of the fluffy frosting that's the norm, so I went a different route & made rhubarb frosting.

I love the way the flavors blend together. The hint of rhubarb cuts the sweetness of the frosting & compliments the nutty flavors in the cake. The first time I tried the frosting, it was on rhubarb cupcakes. That was good, but this was great!

Enjoy!


Happy Day Walnut Cake
Recipe from Mom's Archives, adapted very slightly
Serves 10-12

1 c all-purpose flour
1 1/4 c white whole wheat flour
1 T baking powder
1 tsp. salt
1 1/3 c sugar
1/2 c non-hydrogenated shortening
1 c almond milk
1 tsp. vanilla extract
2 organic eggs
1 c chopped walnuts

Preheat oven to 375*F. Grease and flour two 8" round pans. In the bowl of a stand mixer, sift together flours, baking powder, salt, and sugar. Add shortening and mix. Once combined (mixture should be crumbly), add 1/2 of the milk, the vanilla, and 1 egg. Beat for 2 minutes. Add remaining milk and egg. Beat another 2 minutes. Gently fold in walnuts. Divide batter evenly between pans. Bake for 28-30 minutes or until bake pulls away from the edges of the pan and a toothpick inserted in the center comes out clean. Remove from pans and allow to cool completely on cooling racks before icing.

Rhubarb Frosting
Adapted from Food Doodles

1/2 c organic butter, softened
1 c pureed raw rhubarb, cooked until reduced by half & cooled
5 c powdered sugar
1/2 tsp. vanilla

In a medium bowl, beat the butter, rhubarb puree, and vanilla together to combine.  In 1 cup increments, add the powdered sugar until the frosting is thick and smooth.  Depending on how wet your rhubarb is, you many need to add addtional sugar.

March 14, 2012

Chocolate Almond Mousse Pie


Ï€      Happy Pi Day!    Ï€


Let's celebrate with really rich, really chocolately, super delicious pie!


Seriously, this stuff is amazing. I have so many ideas for variations in flavor & toppings. S'mores pie? Strawberry Truffle Pie? Chocolate Peanut Butter Pie? Almond Joy Pie? The possibilities are endless!

The chocolate almond was delicious, though. When I first tasted it (by licking the spoon, of course!), the almond flavor was super subtle. As it sat, though, the flavor really developed. I like the depth the almond brings to it, while still keeping that strong chocolate flavor.


The darker the chocolate you use, the more chocolatey the pie will be. You can use milk chocolate, but I think the dark chocolate flavor really is best with the almond flavor. For me, the darker the chocolate, the better, so your tastes will definitely vary.

I guess I have to address the fact that the first ingredient is tofu. Don't let it scare you. Even if you hate tofu, you will LOVE this. I promise. You can't taste it at all & it allows you to make a very rich tasting dessert with much lower stats than a traditional mousse has. This pie is low in sugar, high in protein, & lower in calories than traditional mousse. Yay!


Chocolate Almond Mousse Pie
Adapted from Chocolate Covered Katie
Inspired by Upside-Down Fudge-Almond Tart
Serves 8

1 (19-oz) package firm tofu (I used this)
1 T cocoa powder (I used Special Dark, but regular is fine, too)
12 oz. dark chocolate (either chopped bars or chocolate chips)
1/2 tsp. pure vanilla extract
1/2 tsp. pure almond extract
1 T unsweetened almond milk
1 1/2 T amaretto
1/8 tsp salt
3 T pure maple syrup
1/3 c sliced almonds

In a microwave safe dish, heat the chocolate in 30 second increments, stirring in between, until melted. Add all ingredients except sliced almonds into a blender and blend until smooth & creamy. Pour into a 9" round pie plate. Toast sliced almond briefly on the stove in a dry skillet over med-high heat. Sprinkle over the pie. Refrigerate for at least 1 hour before serving to chill & finish firm up.

February 18, 2012

Chewy Cherry Granola


 Last week I ordered chia seeds from Chiaseedsdirect.com. A few days later, 4 pounds of chia arrived on my door step. I don't think I fully comprehended how many chia seeds I was ordering until I opened that box.

For those of you who only think of chia seeds as what you plant on a chia pet, guess what! You can eat them! Chia seeds are extremely healthy - check out these stats! They have healthy omega-3 fatty acids, complete protein, & lots of B vitamins. They don't have a strong flavor, which makes them versatile in cooking & baking.

One thing to note - when chia seeds come in contact with liquid, they form a gel. This makes them perfect for chia eggs, but also means that in most baked goods they will absorb moisture & thicken the batter.


So now, lucky for all of you, I'm on a kick to find ways to use all 4 pounds
I'm not really into chia pudding, although I've only tried pumpkin & I think chocolate would probably rock.

I love adding chia seeds to my oatmeal, but at 1 Tablespoon a day, 4 pounds worth will be rancid before I make it through 1 pound.

Of course, I could freeze some, but that would defeat goal #2 for 2012. I think I still will freeze 2 pounds, but for the rest, it's time to start being creative!


All that, just for some simple granola.

This recipe is filled with nutrients including plenty of omega-3's, fiber, & antioxidants. It's low in fat unlike many granolas (and the fat it does have is healthy fat!). It's also low in sugar. Most of the sweetness comes from the cherry puree, the rest from a spot of honey, both of which are natural sugars & have plenty of nutrients.

If you don't like nuts or are allergic, feel free to eliminate them. We have lots of walnuts, so that's what I used, but I think almonds or hazelnuts would be delicious, too. It would be great without nuts, too.

And for those of you who didn't just purchase 4 pounds of chia seeds, feel free to add some extra oats, flax or wheat germ to compensate. It'll still be good, I promise.


Chewy Cherry Granola
Adapted from How Sweet It Is
Yield: 6-7 cups

4 c old-fashioned oats
1/4 c ground flaxseed
1/4 c wheat germ
1/2 c chia seeds
1/2 c chopped walnuts (or other nuts)
1/4 tsp salt
1 tsp cinnamon
3 T honey
2 T coconut oil, melted (or substitute canola oil)
1 T vanilla extract
2 c cherry puree (about 1 lb of cherries, fresh or frozen)
1/2 c dried cherries
1/2 c coconut flakes (optional)

Preheat oven to 325 degrees. Combine oats, wheat germ, flax, salt, cinnamon & walnuts in a large mixing bowl. Using a food processor, blend pitted cherries until pureed. Stir in coconut oil & vanilla. Add the honey to the oat mixture. Once combined, stir in cherry puree mixture.  Make sure everything is evenly coated. Spread in an even layer on a large baking sheet (or use 2 baking sheets, depending on size). Bake for 30-35 minutes, stirring every 7-8 minutes. Granola should be slightly golden when it is done. As granola cools, it will become slightly crunchy. If you prefer your granola to be very crunchy, bake it for about 10 minutes longer.  Fold in dried cherries and coconut flakes. Store in a sealed container for 1-2 weeks.

January 17, 2012

Cracking Walnuts


 It might not show too much on the blog, but we eat a lot of walnuts. I'm surprised we haven't lost any teeth yet, because inevitably there's always a shell mixed in. I can't complain too much, though, because I have a great source of free, already picked, walnuts.

My grandparents have walnut trees on their farm & they are always sharing them. Lucky for me, Mom & Dad pick them before they pass some on to me. :-) The contraption above is what Dad uses to crack the walnut shell before picking out the meat.


It's very easy to use & much easier for mass cracking than the hand crackers used for individual eating. Still, it's not a perfect system, so sometimes chunks of the shell find their way into the wrong pile. We always know to chew carefully when our food contains walnuts!


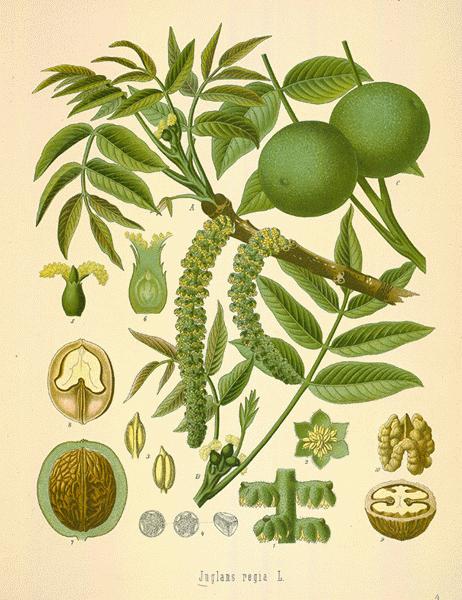
Walnuts grow on trees in big green balls. Inside the green ball is the hard brown shell that we're used to seeing. Once you crack the brown shell, the nut-meat inside is edible. It's amazing how the tree protects its seeds so well!

Both black & English walnuts grow the same way. English walnuts are more commonly found in stores & have a milder flavor. Black walnuts are earthier in taste & have a harder shell. Poppop grows both, but he has more black walnut trees so that's what we usually eat.

File:Black Walnut nut and leave detail.JPG

Seeds are the life line for the tree, so naturally walnuts are chock full of healthy nutrients. They're also a great source of omega-3 fatty acids, which are essential to our health.

Walnuts have been proven to aid in the health of the cardiovascular system, especially the heart. Another great reason to eat walnuts is their antioxidant & anti-inflammatory properites that provide anti-cancer benefits.


Some of my favorite walnut recipes:

Fig & Walnut Biscotti from Michelle


Walnut recipes I think look delicious:


December 1, 2011

Roasted Garlic & Kale Spread


What if every night could be pizza night? I think it'd take me a pretty long time to get tired of pizza, especially with all of the varieties out there. We make 2 pizzas so that there are leftovers for lunches. One is always topped with bbq sauce, the Bup's favorite & a standard in our house. The other one is always different & I like to experiment a little.

I wanted to try carmelized onions & pears, but that got vetoed. :-( Maybe next time...

Instead, I made up a roasted garlic & kale spread, inspired by Ashley's Kale Pesto. We had 2 heads of garlic that were ready to sprout, so I roasted them before they went bad. Roasted garlic is fancy. The garlic turns creamy & spreadable after a short time in the oven., transforming it into a different food altogether.


We used the spread as a sauce on the pizza, but I can see it being great as a topper for baked potatoes or crusty bread, a spread in a sandwich/wrap, or mixed with pasta. I have some leftover to use!

Roasted Garlic & Kale Spread
Inspired by Ashley's Kale Pesto
Yield: about 1 cup

2 heads of garlic
1 tsp. olive oil
2 c kale, chopped (about 100g)
juice of 1 lemon
1/4 tsp. salt
1/4 tsp. black pepper
1/3 c roasted hazelnuts

Preheat oven to 350*F. Slice off the top of the garlic heads, to expose the tops of the cloves. Wrap each head seperately in aluminum foil & drizzle each head with 1/2 tsp. of olive oil. Bake for 25-30 minutes or until garlic is soft. Squeeze cloves out of the husks. Place garlic & remaining ingredients into a food processor or blender & blend until combined. I left mine with some chunks, but if preferred, continue to blend until smooth. Taste & add additional salt and/or pepper if desired. Store extra spread in an airtight container in the refrigerator or freezer for future use.

November 23, 2011

Cranberry, Beet & Pear Salad


I'm in a festive mood! I'm so ready for the upcoming holidays & everything they include. I love all of the family & friend time, yummy foods, decorating, gift wrapping/giving, & general excitement!

As we go into the holidays, I'm trying to keep our dinners healthy, light, & full of nutrients. With the weather getting cooler, it's so tempting to cozy up by the fireplace in the evenings & become a lot less active. The chilly weather also makes people much more susceptible to diseases, so I want to make sure we're fueling our bodies with lots of healthy foods.

Our oven has been on almost every night. Something about this dreary weather makes me crave warm foods. I may or may not also want to use the oven because it warms up the kitchen. I always leave the door open after I turn it off to let all the heat into the room. :-)


You're looking at our entire beet crop. I planted 2 rows! :-( They just didn't get big. It took me forever to clean these because they were all about the size of a vitamin. There were only about 4 or 5 that made it to ping pong ball size. Still, they tasted the same! I'm thankful to have gotten any at all.

I love the way beets color everything around them. Cranberries do the same thing, so this made a really pretty medley. The onion wedges turned a pinkish purple after they were done baking. 


Maybe this looks more like Christmas than Thanksgiving...

The cranberries add a lightly tart flavor to the salad. Combined with the crunch of the hazelnuts & the sweetness of the beets & pears, this salad was warming & fresh at the same time.


Cranberry, Beet & Pear Salad
Yield: 2 main dish salads or 4 side salads

4 large beets
1 medium white onion
1/2 c fresh cranberries
1 T balsamic vinegar
1/4 tsp. black pepper
4-5 c lettuce mixture (romaine, red leaf, spinach, radicchio, etc.)
2 pears
1/3 c roasted hazelnuts
1/3 c Cranberry Dressing (see below)

Preheat oven to 400*F. Spray a baking sheet with olive oil cooking spray. Cut beets and onion into uniform wedges. In a medium bowl, combine beet wedges, balsamic vinegar, and pepper. Arrange on baking sheet in a single layer. Bake for 20 minutes, stirring once. Add onion wedges and cranberries, mixing with beets. Bake another 25-30 minutes, stirring occasionally to keep from sticking.

In the meantime, divide lettuce between two (or four) bowls. Thinly slice pears and arrange on top. Once beet mixture is done roasting, divide between salads as desired. There may be some extra - this will keep in the fridge for 3-4 days and can be reheated. Top salads with hazelnuts and Cranberry Dressing.

Note: If you don't feel like making the Cranberry Dressing, you can still make this salad! There are cranberry dressings available in some stores, or you could substitute either Raspberry Vinaigrette or Balsamic Vinaigrette.

Cranberry Dressing
Yield: 1 1/2 cups

1 c fresh cranberries
1/2 of a pear, roughly chopped
1/2 of an apple, roughly chopped
1/4 red onion, roughly chopped
1/2 jalapeno, chopped & seeded
1/4 c apple cider vinegar
2 T lime juice
3 T orange juice
2 T honey
1 tsp. Dijon mustard
1 T dried cilantro (or 1/4 c fresh cilantro)
1/2 teaspoon salt
1/4 tsp black pepper

Combine everything in a food processor or high speed blender and blend until smooth. Taste & add more honey or salt if desired. Store remaining dressing in an airtight container in the refrigerator.

November 15, 2011

How To: Roasted Chestnuts


Have any of you actually eaten a roasted chestnut? There's The Christmas Song (aka Chestnuts Roasting on an Open Fire) about them that we hear every year, but for the majority of my life, that was all I knew about them.

Turns out, they're delicious! As an added bonus, they automatically make your house smell like the holidays!


My in-laws have a chestnut tree in their backyard & this is the second year that they shared the nuts with us. It's probably the last year, too, as the fall snow storm severely damaged the tree.

It's not hard to roast the chestnuts at all. If you know anyone with a tree, it's practically free, but even if you don't, they aren't overly expensive to buy, either.

First, you score each chestnut with an X. You want to cut the skin all the way through so that they're easier to peel. Last year, I just barely cut them & it took me forever to get them open. This time, I cut them with scissors - push the tips into the side of the chestnut & close the blades, then repeat to form an X. Unless you're trying to have perfect, whole chestnuts, it's okay to cut into the meat. You'll see a white X on the roasted nut later, but it doesn't change the taste.

They bake in the oven for about 30 minutes & make the house smell delicious!


As soon as they come out & cool enough to handle, it's time to peel them. While they are still warm, the nut is pliable so you can squeeze the shell to break them open at the X's. As they start to cool, you'll notice that peeling them gets a lot harder. If they cool too much, just stick them back in the oven for about 10 minutes to warm up again.

Ta-da! A big bowl of roasted chestnuts to enjoy!

Roasted Chestnuts

1 lb. chestnuts (or as many as desired)

Preheat oven to 350*F. Use scissors to score chestnuts with an X, making sure to cut all the way through the outer skin. Be cautious as to not cut yourself. Lay chestnuts in a single layer on baking sheets (use as many as needed for the amount of chestnuts you have). Bake for 30-35 minutes or until the outer skin peels back around the X. Remove from oven & let cool briefly. As soon as the chestnuts are cool enough to handle, peel off the outer skin. Store chestnuts in a loosely covered container (not air-tight) for up to 2 weeks at room temperature. They can be frozen in a freezer bag for future use for up to 1 year.

Note if you are using naturally grown chestnuts: as you score them, check for little holes. If they have holes, they have worms, so just get rid of them right away. After you bake them, there may still be a few duds, so if you see one that's black or white or just looks a little off, don't eat it. Better safe than sorry!


October 10, 2011

Fresh Tomato Basil Soup


I love fall.

I can't say it enough! There's just something about this time of year that sings to me.

Sunshine

Crisp morning air

Leaves crunching under my feet

Warm colors

Cinnamon scents

Raking leaves

Pumpkins everywhere


We had warm fall weather this weekend but I'm still craving soup. This soup combines the flavors of summer with the cooler fall weather. Our tomato crop is starting to wind down, so we're eating them as much as possible before they're gone. The basil leaves are getting cold spots on them, so the first frost must be coming soon.


In other interesting news, one person found my blog by doing a google search for "пиво и девушка." I wonder what they were looking for...I hope they found it.

Hopefully you're enjoying fall as much as I am! Take some time to go for a walk and admire the changing leaves and breathe in the fresh autumn air. Then come home and warm up with the last flavors of summer in this easy to prepare soup.

Fresh Tomato Basil Soup
Serves 4-6

12-15 fresh tomatoes, any variety (should be 6 c once pureed)
1/2 c fresh basil, packed
1/3 c nutritional yeast
1 small onion
1 T minced garlic
1/2 c raw cashews
1/2 c water
1 T Italian seasoning
1 tsp sea salt
1 tsp black pepper
sucanat, to taste (or substitute sugar)

Measure cashews and cover with water. Set aside to soak for 30 minutes or overnight. Quarter tomatoes and remove the white stem/core. Fill VitaMix/blender with tomatoes and process until smooth. If all of the tomatoes did not fit in the blender, hold the rest for later. There should be no skins or seeds visible at this point - they should be blended together with the juices. Add basil, nutritional yeast, onion, and garlic. Process again until smooth. Transfer to a medium pot and heat over medium heat. At this point, if there are any tomatoes remaining, blend those and add to pot. Drain the soaked cashews and blend with 1/2 cup of water in the same blender (no need to wash it in between) until it reaches a creamy consistency. Once the soup comes to a low simmer, add cashew cream, Italian seasoning, salt and pepper. Let cook on medium low for 15-20 minutes to allow flavors to develop, stirring occasionally. Taste the soup. If it is bitter, add sucanat, 1 teaspoon at a time. Ladle into bowls and serve!

Note: If you do not have nutritional yeast on hand, substitute parmesan cheese for a similar flavor.

Note: I find that making the cashew cream is well worth the effort. Not only does it provide additional nutrients & healthy fats, but it also doesn't curdle like dairy would. You can use milk or cream, but be cautious and do not allow soup to boil.

July 9, 2011

Toasted Almond Drinks


Yum!

Every year when we're at the beach, Dad's in charge of the nightly ladies' drinks. He has a few standards, like margaritas and citrus daiquiris, but he also throws in a few new ones. 

Since we divided up into 2 houses, I miss most of the drinks. :-( I always make sure I know when margarita night is, though! He makes the very best!

Because of ladies' drinks, Dad is always on the lookout for new drinks. This time, inspiration came on a restaurant placemat. 


I was reading the placemat when I saw this. Classy way to find a recipe, I know.

It's a great dessert beverage, especially for summer, because it reminds me of a spiked iced coffee. Of course I had to change it up a little, mostly because I'm not into drinking heavy cream.

And because I'm seemingly incapable of just drinking my dessert, we had ours with the last slices of Brownie Fruit Pizza.


Cheers!

Vegan Toasted Almond Drink
Adapted from a random placemat & about.com
Serves 1

1.5 oz coffee liqueur
1.5 oz amaretto
1 oz Unsweetened Almond Breeze, Original or Vanilla

Measure into a glass and stir. Add ice* if ingredients were not already cold or if you just want a really cold drink.

*Adding ice will weaken the drink. Your choice!
Related Posts Plugin for WordPress, Blogger...