Showing posts with label how to. Show all posts

March 19, 2013

Mint Chocolate Green Smoothie + Green Ice Cubes


I have a little secret to share! I'm sure you have all heard about the green smoothie craze that's everywhere. Maybe you've thought they're gross, or maybe you've wanted to try them, but are overwhelmed by all the fresh greens you'd need to keep on hand.

If you think they're gross, I promise you they're not! Start small, with just a handful of spinach, and I guarantee that you won't even notice it's in there. Even if you never add any more than that, at least you're still getting in some greens & all the nutrients that they hold!

If you're in the second group & overwhelmed by the vast quantity of greens you'd need to keep on hand, this tip is for you!

Whether you're a gardener or shop at farmer's markets, there's no question that greens are fresher, tastier, & cheaper when they are in season. I grow kale, Swiss chard, spinach & mixed lettuces each year. They're easy to maintain & they produce quite a lot! Toward the end of the season, I always have an abundance of kale & Swiss chard that I hate to see go to waste when the first frost comes. I take an hour one day in the fall to pick as much as possible, clean it, and make green ice cubes for our winter smoothies. It's easy & I'm always so grateful to have them when greens aren't so abundant.

Taking the time out to make the green ice cubes encourages me to make more green smoothies in the winter. I never have to worry about whether I bought fresh greens or how expensive they might be. I just reach in the freezer, pull out a handful of green cubes, & my smoothie is suddenly full of extra nutrients! I love knowing that these greens were freshly picked & frozen right away, straight from my garden.


 I know that now isn't the best time to be making green ice cubes, but I hope that you'll remember this & try it in the fall. If you start now, you could even try growing some kale yourself! Plant the seeds, water them occasionally, & watch them grow. You can dine well this summer/fall + have green ice cubes during the winter. In the meantime, if you want to try this smoothie, just use a couple handfuls of whatever greens you have on hand.

I thought this smoothie tasted like mint chocolate chip ice cream, so I just had to share. I think that if the Bup wasn't eagerly awaiting his half, I might have drank the whole thing! :-)

 
Mint Chocolate Green Smoothie
Serves 2

2 frozen bananas
6 green ice cubes (or 3-4 handfuls of spinach/other greens)
1 tsp. chia seeds
1/4 tsp. mint extract
1 scoop chocolate protein powder (I used vegan, non-GMO Pure Matters Chocolate Pea Protein)
2-3 c unsweetened almond milk

Combine all ingredients in a high speed blender & process until smooth. Pour into 2 glasses and serve immediately. Smoothie can also be stored in an airtight container in the refrigerator for 2 days. Shake/stir before serving.

Green Ice Cubes

3 bunches of kale, washed
3 bunches of Swiss chard or collard greens, washed
water

Remove the tough bottom part of the stems (about 1/3 up the stalk - the rest should blend just fine). Working in batches, tear leaves into pieces and blend in a high speed blender* with just enough water to allow the greens to move around. Once the first batch is blended, pour 2/3 of the greens into ice cube trays. Add more torn leaves into the 1/3 remaining mixture and blend again. By leaving some of the mixture in the blender, it allows the greens to blend more easily so that you don't need to add as much water. Continue this process until all greens are blended. Place filled ice cube trays in freezer. Once frozen (to be safe, allow at least 10 hours), remove cubes and store in zip lock freezer bags in the freezer. Remove cubes as needed, making sure to reseal the bag. Frozen green cubes should last about 6 months.

*If you don't have a high speed blender, I think you could use a food processor or a regular blender. You may need to completely remove the stems & add more water to get the greens properly blended.

January 17, 2012

Cracking Walnuts


 It might not show too much on the blog, but we eat a lot of walnuts. I'm surprised we haven't lost any teeth yet, because inevitably there's always a shell mixed in. I can't complain too much, though, because I have a great source of free, already picked, walnuts.

My grandparents have walnut trees on their farm & they are always sharing them. Lucky for me, Mom & Dad pick them before they pass some on to me. :-) The contraption above is what Dad uses to crack the walnut shell before picking out the meat.


It's very easy to use & much easier for mass cracking than the hand crackers used for individual eating. Still, it's not a perfect system, so sometimes chunks of the shell find their way into the wrong pile. We always know to chew carefully when our food contains walnuts!


Walnuts grow on trees in big green balls. Inside the green ball is the hard brown shell that we're used to seeing. Once you crack the brown shell, the nut-meat inside is edible. It's amazing how the tree protects its seeds so well!

Both black & English walnuts grow the same way. English walnuts are more commonly found in stores & have a milder flavor. Black walnuts are earthier in taste & have a harder shell. Poppop grows both, but he has more black walnut trees so that's what we usually eat.

File:Black Walnut nut and leave detail.JPG

Seeds are the life line for the tree, so naturally walnuts are chock full of healthy nutrients. They're also a great source of omega-3 fatty acids, which are essential to our health.

Walnuts have been proven to aid in the health of the cardiovascular system, especially the heart. Another great reason to eat walnuts is their antioxidant & anti-inflammatory properites that provide anti-cancer benefits.


Some of my favorite walnut recipes:

Fig & Walnut Biscotti from Michelle


Walnut recipes I think look delicious:


November 15, 2011

How To: Roasted Chestnuts


Have any of you actually eaten a roasted chestnut? There's The Christmas Song (aka Chestnuts Roasting on an Open Fire) about them that we hear every year, but for the majority of my life, that was all I knew about them.

Turns out, they're delicious! As an added bonus, they automatically make your house smell like the holidays!


My in-laws have a chestnut tree in their backyard & this is the second year that they shared the nuts with us. It's probably the last year, too, as the fall snow storm severely damaged the tree.

It's not hard to roast the chestnuts at all. If you know anyone with a tree, it's practically free, but even if you don't, they aren't overly expensive to buy, either.

First, you score each chestnut with an X. You want to cut the skin all the way through so that they're easier to peel. Last year, I just barely cut them & it took me forever to get them open. This time, I cut them with scissors - push the tips into the side of the chestnut & close the blades, then repeat to form an X. Unless you're trying to have perfect, whole chestnuts, it's okay to cut into the meat. You'll see a white X on the roasted nut later, but it doesn't change the taste.

They bake in the oven for about 30 minutes & make the house smell delicious!


As soon as they come out & cool enough to handle, it's time to peel them. While they are still warm, the nut is pliable so you can squeeze the shell to break them open at the X's. As they start to cool, you'll notice that peeling them gets a lot harder. If they cool too much, just stick them back in the oven for about 10 minutes to warm up again.

Ta-da! A big bowl of roasted chestnuts to enjoy!

Roasted Chestnuts

1 lb. chestnuts (or as many as desired)

Preheat oven to 350*F. Use scissors to score chestnuts with an X, making sure to cut all the way through the outer skin. Be cautious as to not cut yourself. Lay chestnuts in a single layer on baking sheets (use as many as needed for the amount of chestnuts you have). Bake for 30-35 minutes or until the outer skin peels back around the X. Remove from oven & let cool briefly. As soon as the chestnuts are cool enough to handle, peel off the outer skin. Store chestnuts in a loosely covered container (not air-tight) for up to 2 weeks at room temperature. They can be frozen in a freezer bag for future use for up to 1 year.

Note if you are using naturally grown chestnuts: as you score them, check for little holes. If they have holes, they have worms, so just get rid of them right away. After you bake them, there may still be a few duds, so if you see one that's black or white or just looks a little off, don't eat it. Better safe than sorry!


October 28, 2011

Candle Making


I have a lot to say today, so bear with me. I'm getting old.

Have you ever used Icy Hot? Or Bengay?

Don't do it. Just don't.

It's giving me a complex.

We had our first frost last night, so I should be expected to be chilly today. It's not quite chilly enough to need a turtleneck AND a turtleneck sweater.

My knee is telling me otherwise. It's Icy Hot.

Here's where the getting old part comes in. All ranting aside, my joints are going. We were walking down the sidewalk last night & my knee suddenly twinged, resulting in sharp pain everytime I bend it to step down.

After choir, I rubbed on some Icy Hot, put on my knee wrap, & rested my knee. I should've learned my lesson then, since my knee was freezing, causing the rest of me to be bizarrely chilled, but I didn't.

This morning, after my shower, I put on more. This resulted in me getting so cold that I then dressed like I live in the arctic. It's all an illusion of being cold even though I know I'm not. Super confusing!

To top that off, I actually had someone tell me I look like a grape. They softened the blow by saying they really like grapes. Um...thanks?


So back to this candle making thing.

We like to save the bottom layer of wax from candles, melt it down, and make new candles. There's always a layer, about 1" thick, of wax in the bottom of those jar candles. It really adds up quickly, so we like to reuse it. Candles are pricey!


How to form a new candle out of old wax:

1. Carefully scrap the wax out of the bottom of an almost empty candle jar. The easiest way is to use a knife (carefully!) to loosen the edges & then break the piece apart to remove the pieces.

2. Remove any remaining wick or base pieces.

3. Combine wax pieces into a glass jar (we use one that we just emptied).

4. Melt wax, either in the oven or microwave.

5. Insert a wick (found at craft stores) into the melted wax. Make sure it goes to the very bottom, to ensure the candle will burn as long as possible. To keep the wick straight, tie it to a pencil or skewer and lay it across the top of the jar.
Hint: Use a bamboo skewer or similar item to guide the wick straight down into the wax.

6. Set candle aside to cool.

7. If pockets develop in the top of the candle, melt additional wax and pour into the pockets to fill.

8. Burn as desired!

September 28, 2011

Attempting Chipotle Burritos

One of the perks of eating at Chipotle is the variety and options available. It's no extra work if everyone wants a different variety of burrito, because they're all there and ready to scoop. And it's ALWAYS delicious!


Another perk is their great dedication to a better food world. I'm sure you noticed already, but I feel very strongly about sustainable eating. I love knowing that when I'm giving my money to a company, I'm also giving it to a cause I believe in.

Luckily, the Bup and I have very similar taste, so when I decided to try to make Chipotle-like burritos for dinner, I didn't need to go overboard with options.


Chipotle is nice enough to provide their ingredients on their website. I followed their loose instructions and the result, while really tasty, wasn't quite the same. Close though for at home eating, though! I think my main problem was the wrap. It was only about half the size of theirs, so I couldn't fill it as full. It was also whole wheat, which has a stronger flavor than the ones at Chipotle. If you're going to recreate this, I'd recommend using a very large, plain flavored wrap.


For their black beans, here's what they say: "Our black beans are seasoned with cumin, garlic and other spices, then slow cooked until tender and slightly al dente."  I didn't have time to slow cook them, so I tried cooking them in a little water to soften them. It worked! I was looking for flavor more than anything else, though. The "other spices" part gets a little tricky, but they have a Mexican flair so I used onion powder & chili powder.


The Fajita Vegetables weren't too hard - they're just green bell peppers, red onions, and some fresh oregano. I love this part of the burrito experience, so I put in the extra (minimal) effort.


I skipped the rice, even though I love it. When we eat at Chipotle I usually get the salad, which I love having the rice on. In a tortilla, though, I feel like it's optional. The Bup doesn't really like rice in his burritos, so I didn't mind doing without, too.


We made fresh salsa earlier in the week in the VitaMix, so I'm using that.


I thought the guacamole would be the hardest part to replicate, but it turned out the best!
"Hand mashed, ripe Hass avocados, mixed with freshly chopped cilantro, red onions, jalapeño peppers, citrus juice, salt and selected spices until silky, sexy and delicious."
"Silky, sexy & delicious" is right! Again, it's those "selected spices" that are the kicker. I used my VitaMix for the guac, and I think that's a key step. It's always so creamy and thick. I usually use a fork to mash the avocado, which results in a tasty but chunky guac. In the blender, all the flavors really come together and it gets super creamy.


The fixings, minus the lettuce and the tortilla chips we used to finish off the guac. :-)


Assembled & ready to eat!

Almost Chipotle Burritos
Inspired by Chipotle
Serves 2

1 1/2 c cooked black beans (or 1 15oz. can, drained & rinsed)
1/2 c water
1 1/2 tsp cumin
2 tsp minced garlic
3/4 tsp onion powder
3/4 tsp chili powder
1/4 tsp sea salt
1 medium red onion, sliced
1 medium bell pepper, sliced
1 T fresh oregano, chopped
1/2 c fresh tomato salsa
Guacamole (see recipe below)
2 large tortillas (we used small whole wheat ones, which altered the traditional flavor & texture too much)
Optional garnishes: shredded lettuce, cheddar cheese, sour cream, fresh corn

In a nonstick pan, heat black beans and water on low. Add cumin, minced garlic, onion powder, chili powder & salt. Cook on low for 10-15 minutes, stirring often, until water has cooked off, and the beans soften and begin to break apart. Remove from pan, place in serving dish and set aside.
Using the same pan, lightly saute bell pepper and red onion for about 5 minutes on low, just until slightly wilted. Toss with fresh oregano.
If desired, heat tortillas in the nonstick pan or in the microwave, wrapped in a damp cloth.  Fill with beans, fajita vegetables, salsa, guacamole, and other garnishes, to taste.

Guacamole
1 avocado
1 small jalapeno pepper, deveined and seeded (unless you want a hot kick to it!)
1/2 small red onion, chopped
2 T lime juice
1/2 tsp dried cilantro (or 1 T fresh cilantro)
1/4 tsp sea salt
1/2 tsp black pepper
1/2 tsp garlic powder

Prepare guacamole by pureeing the avocado, jalapeno, red onion, lime juice, cilantro, salt, and garlic powder in a blender or food processor until smooth. (If you prefer chunky guacamole, mash with a fork by hand. Just make sure the onion is finely chopped!) Place in a small bowl along with the pit from the avocado and cover tightly. Refrigerate until ready to eat.

September 20, 2011

How To: Pumpkin Puree

I love pumpkin puree.


 Remember that HUGE pumpkin we grew last year? Over 30 pounds?! 


Seriously huge. 


It didn't even fully ripen because the frost hit long before it had time to finish growing. I can't imagine the size if it had more time!


Even the chunks of it dwarfed my cutting board and even the toaster oven!


It broke our blender.


We got a new one for the second half.


Seriously a ton of pumpkin.

Well, this year, no random pumpkin vine started growing and by the time I thought to plant one it was too late.

Luckily, they're selling them at the market. I got one for $1 that weighed 8.4 pounds!

Since I love pumpkin so much, one of the most important things that I do in the fall is bake, puree, and freeze pumpkin. That way I have it ready to go all winter long.

Step 1: Buy a really huge pumpkin.

The bigger, the better. Once you get rolling, it's easiest to do it all at once. If you can't find a big pumpkin, use 2 smaller ones. I don't really like messes, so the less times I go through this process the better!

Step 2: Cut it in big chunks.

Preheat your oven to 375 before you start chopping. I usually chop the neck part into at least 4 chunks and then the round part in half. You will need a very sharp knife. Use carefully!


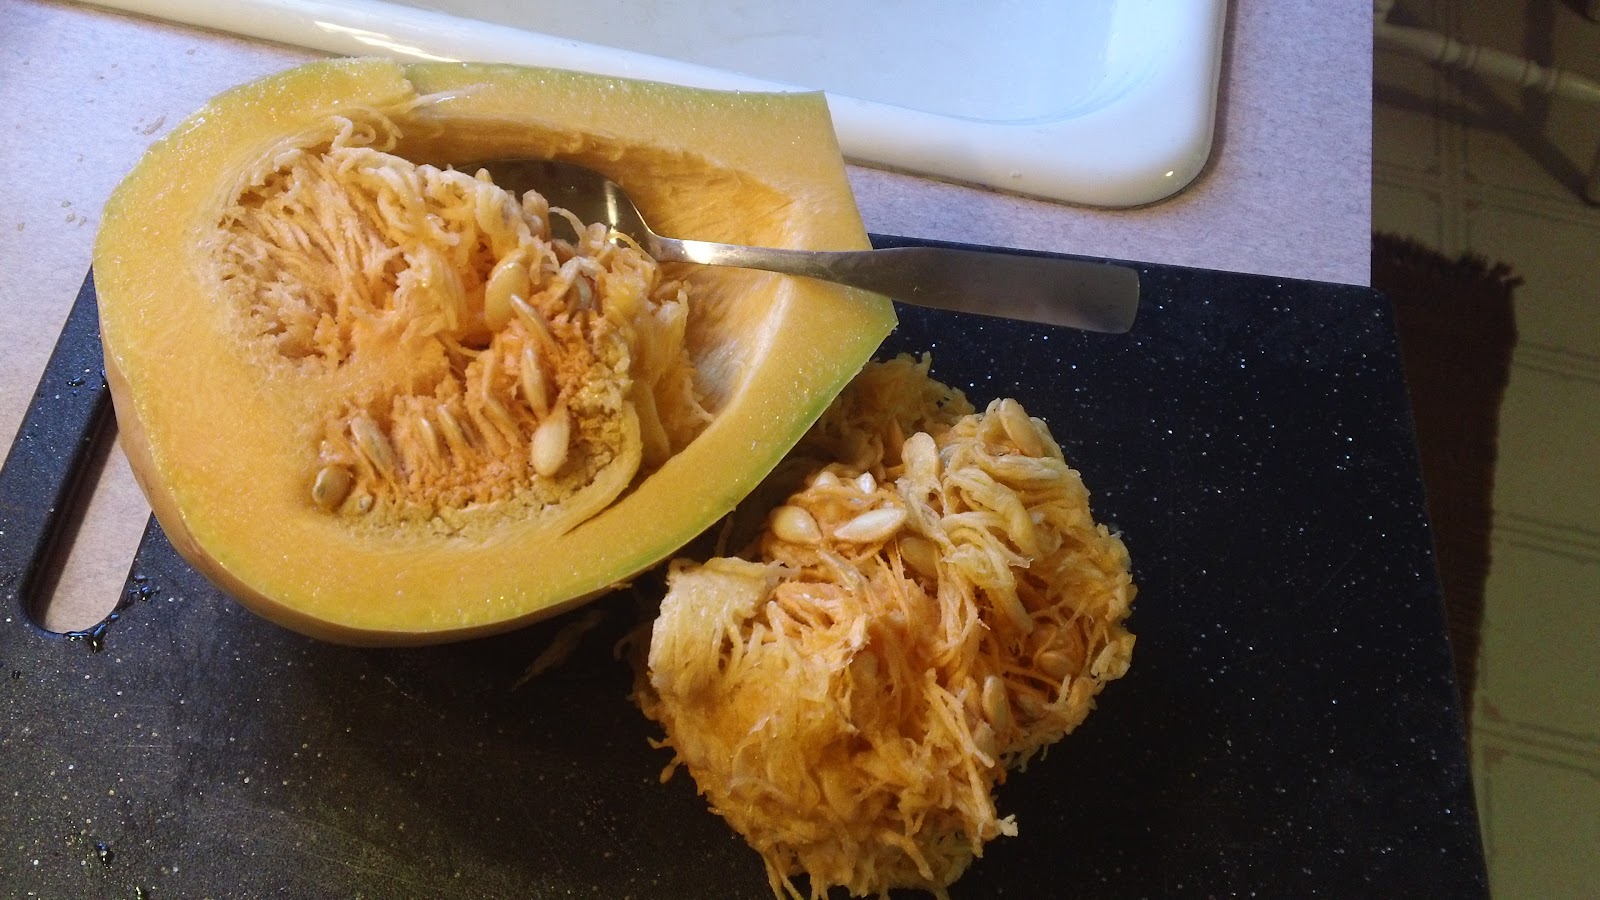
Step 3: Remove seeds & pulp.

The easiest way to remove all the goop is with a metal spoon. It's not sharp, but it scrapes the stuff out well. Reserve the pulp for Step 6.


Step 4: Place chunks face down on baking sheets.

Using as many baking sheets as necessary, lay the pumpkin chunks with the insides down on the sheets. There's no need to grease the sheets.

Step 5: Put in oven and pour water onto baking sheets.

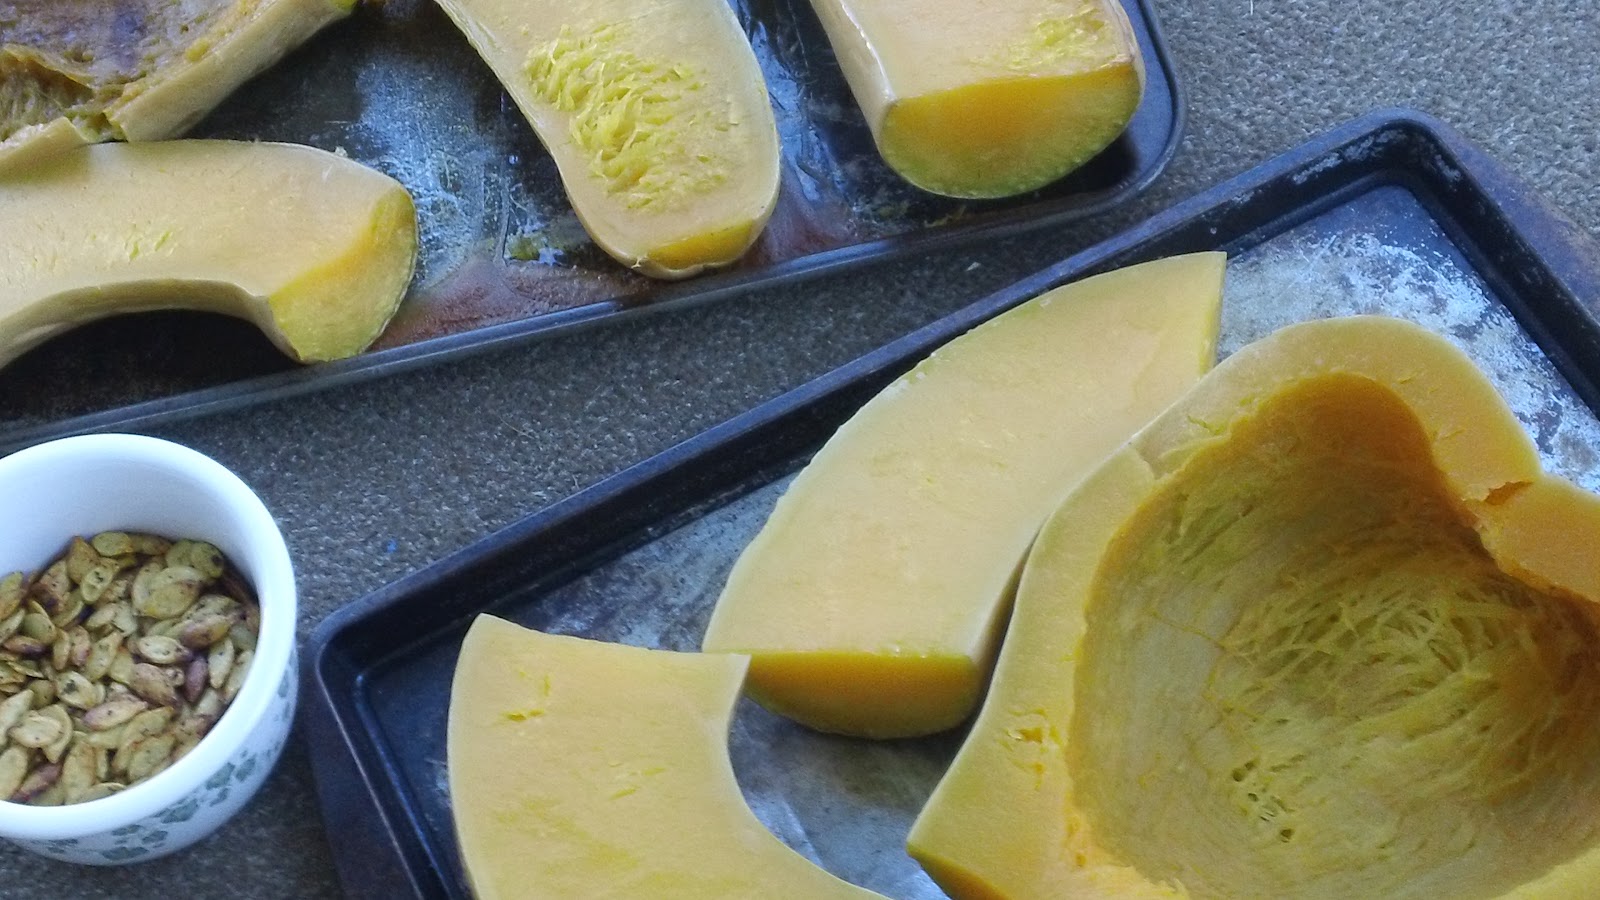
Put the baking sheets in the oven before adding water to them! I always make a mess otherwise. Once they are in the oven, carefully pour enough water over them to cover the bottom of the sheet with about 1/4" of water. Let bake for 40-45 minutes or until soft. You can check doneness by poking through the skin of the thickest chunk with a fork. If the fork slides in easily, they're done.

Step 6: Clean seeds.

Time to get messy! This step is optional but worth it cause you can eat the results right away. Sort through the pulp (it's easiest to use your hands) to remove all the seeds. Discard the pulp. Rinse seeds and dry with a towel.


Step 7: Season and bake seeds.

Season the seeds however you wish. I used salt and pepper this time, but we like curry powder a lot, too. Lay seeds flat on a greased baking sheet or pie pan. Bake for about 20 minutes, stirring frequently. They are done when they are lightly browned and crisp.


Step 8: Let pumpkin cool.

Remove pumpkin from the oven, being careful not to spill any water that may remain on the baking sheets. Set aside to cool for about an hour. I always try to work with it too quickly and burn myself. Don't do that.


Step 9: Remove outer skin.

Using either your hands or a spoon, scrape the cooked pumpkin off of the outer skin. Discard skins.

Step 10: Puree in food processor/blender.

Working in batches, put cooked pumpkin into a food processor or blender. Process until smooth and creamy.


Step 11: Divide and freeze or use.

I usually freeze my puree in 1.5-2 cup batches. Most recipes call for anywhere between .5-1.5 cups of pumpkin, and I like to have leftovers for things like pumpkin oatmeal and pumpkin drinks.

Some yummy things to make with your pumpkin puree:
Related Posts Plugin for WordPress, Blogger...