Showing posts with label healthy fats. Show all posts

March 27, 2013

Chocolate Bunny Butt Cake + Healthy Peanut Butter Frosting


Last weekend, we had my grandparents over for dinner & to play pinochle. Since we won't see them on Easter, I wanted to have it be an Easter-ish dinner. I asked the Bup what he wanted for dessert and he said, "Chocolate cake!" Surprise! That's what he always wants...

I started thinking of how to make chocolate cake more spring/Easter themed, & stumbled on the Bunny Butt Cake, courtesy of Betty Crocker. Of course, I had to healthify it, so I made my own cake & frosting.

This cake is dense & chocolatey. It's my favorite chocolate cake - one of the few cakes that I could eat without any frosting. That's really saying something, because usually I'm a frosting nut & don't much care about the cake part. While I'm not going to say this is a health food & you should have it every day, it is fairly healthy for chocolate cake.

And the frosting!!!! It's delicious! This is my new go-to peanut butter frosting. It has no butter & no refined sugars, yet it's sweet & smooth, just like it should be. Even if you don't make the cake, you could still use the frosting for other cakes/cupcakes. Believe me, it's yummy!

If you need a dessert for Easter, I hope you'll try this!


Chocolate Bunny Butt Cake
Adapted from Eating Well
Serves 8-10

1 3/4 c white whole wheat flour or spelt flour
3/4 c evaporated cane juice (or organic sugar)
2/3 c unsweetened cocoa powder
2 tsp baking powder
2 tsp baking soda
1/2 tsp salt
1 c buttermilk (I used 2 T apple cider vinegar + 1 c unsweetened almond milk)
3/4 c packed light brown sugar
2 large eggs, lightly beaten
1/4 c coconut oil, melted
2 tsp vanilla extract
1 c hot strong black coffee
1 batch Healthy Peanut Butter Frosting (see recipe below)
2-4 T shredded coconut.

Preheat oven to 325°F. Coat a 1 1/2-quart ovenproof bowl (8 inches across top) and 6 muffin cups from a regular-size muffin tin with coooking spray.  

Whisk flour, granulated sugar, cocoa powder, baking powder, baking soda and salt in a large bowl. Add buttermilk, brown sugar, egg, oil and vanilla. Beat on medium speed for 2 minutes. Add hot coffee and beat to blend. Don't worry - the batter is supposed to be thin.

Pour cake batter into the muffin cups, filling each about 2/3 full. Pour remaining batter into the ovenproof bowl.

Bake cupcakes 20-22 minutes, and the bowl 60-70 minutes or until toothpick inserted in center comes out clean. Cool 10 minutes each before removing from muffin cups and bowl. Cool completely on wire racks.

Place large dome cake, flat side down, on a large serving platter. Coat with frosting to desired thickness, reserving some frosting for the feet and tail.  Place 2 cupcakes for feet on the bottom of the cake. Place 1 cupcake for the tail a few inches up, centered between the feet. Secure each cupcake with a toothpick through the center, pushing in until it does not show. Carefully coat feet and tail with frosting. Sprinkle shredded coconut onto the tail, pressing gently so that it sticks to the frosting.

Note: This chocolate cake can also be made in 2 round 9" or 8" pans, or a 9x13 pan. Baking times will vary.


Healthy Peanut Butter Frosting
Makes 2.5 cups of frosting

1 1/3 c natural peanut butter
16 dates
2/3 c water
1/4-1/2 tsp. salt (if your pb has salt in it, use the lesser amount and adjust to taste)
1/3 c old-fashioned oats
3 T maple syrup
1/2 c unsweetened almond milk

Combine all ingredients in a high speed blender or food processor. Process until smooth and creamy, adding more milk if necessary. Refrigerate in an airtight container for 2 hours to allow flavors to meld and frosting to thicken. This can be done ahead of time; I made mine the night before. When the cakes are cooling, remove from fridge to allow to come to room temperature for easier spreading. Extra frosting can be frozen in an airtight container for about 3 months.

November 12, 2012

Asian Inspired Brown Rice Noodle Bowl


We had to make a quick dinner last Thursday. I get home from work at 5:15ish, & we needed to cook & eat in an hour before heading out again. I was originally going to make a pasta with tomato sauce (that I made & froze earlier), but I was in the mood for something different. This dish came together quickly, especially with the Bup helping chop veggies while I mixed the sauce.

We had a few moments of panic when the water wouldn't come to a boil. Somehow the flame went out on the burner, but it was still pumping gas out into the air! Luckily the Bup discovered what happened before we got gassed out. Even with the set-back, we still had time to do the dishes before leaving.


I love the many flavors of Asian cooking. There is such a variety of sauces & they all have their own unique differences that really bring something to a dish. As a vegetarian, it's always a joy to go to an Asian style restaurant because their foods rely heavily on whole grains & veggies. 

This dish had equal parts crunch & chew, plus some creamy bites due to the avocado. The sauce does have a kick to it from the chili garlic sauce, so if you are sensitive to heat, you may want to omit that. It would change the flavor a bit, but it would still be good. I hope you get the chance to make this. I know we'll be making it again. I can't wait!


Asian Inspired Brown Rice Noodle Bowl
Serves 4
 
8 oz. brown rice noodles
1 small red onion, thinly sliced
2 large or 4 small bell peppers, sliced
1 jalapeno, diced
3 oz. edamame (fresh or frozen)
1 carrot, shredded
1 avocado, diced
juice from 1 lime
1/4 c rice vinegar
1 T toasted sesame oil
3-4 T Bragg Liquid Aminos (or soy sauce)
1 T natural creamy peanut butter
2 cloves garlic, minced
1 tsp. chili garlic sauce (like this)
1/2 tsp. sea salt
2 tsp. honey
1-2 T water, if needed to thin
1/4 c peanuts

Start the heat under a large pot of water to begin to bring it to a boil. Saute the onion, bell peppers, jalapeno, carrot, & edamame over medium heat for about 6-7 minutes, or until the veggies soften. 
In a small bowl, gently toss the avocado with the fresh lime juice (this prevents browning). Set aside. Whisk all of the remaining ingredients together in a separate bowl.
Once the veggies and sauce are ready, cook the rice noodles according to package directions.*  Drain & combine noodles, veggies & sauce in a large serving bowl. Serve immediately. Top each serving with about 1 T of peanuts.
*Rice noodles take such a short time to cook that it's best to wait so that you can mix everything together as soon as they are done cooking.

Inspired by Grubarazzi's Avocado Rice Noodles

May 15, 2012

Blueberry Oat Super Smoothie


For our 3 year anniversary, my parents gave us a VitaMix. Since then, we started the tradition of having a green smoothie every Sunday morning before church. I usually stick to the same general mix, but when I come across a tasty looking smoothie recipe online, I can't resist trying it out.

I don't often have all of the right ingredients, so I can't say that I've ever recreated any recipe exactly, but many have come close. This particular smoothie inspiration came from the Whole Foods recipe site. I added spinach for extra nutrients & changed up a few other ingredients for things we had on hand.


It's very dark because of the blueberries & spinach together, but don't let that fool you. It's delicious!

This one drink is loaded with antioxidants from the blueberries, omega-3 fatty acids from the flax, and vitamins & minerals from the other ingredients. It's a super smoothie, guaranteed to fuel you through a busy morning. Drink & enjoy!


Blueberry Oat Super Smoothie
Adapted from Whole Foods
Serves 2

1/2 c orange juice
1 c coconut milk (refrigerated, not canned)
2/3 c frozen blueberries
1/2 c old-fashioned oats
1 T flax seeds
1/2 tsp ground cinnamon
1 small frozen banana
1 large handful spinach

If using a high speed blender:
Add all ingredients to the blender, process, and enjoy!

If using a regular blender: 
Add spinach, flax seeds, milk, and orange juice to blender. Process until mixture looks smooth, and then process for another 30 seconds. Add remaining ingredients and blend until smooth. Pour and enjoy!

Note: Smoothie will keep in an airtight container overnight in the refrigerator but may have a thinner consistency than when fresh.


April 19, 2012

Vibrant Lemon & Avocado Kale Salad


We really have a thing for kale in our house. I think I've mentioned that a few zillion times already! I hope you like it as much as I do.

I didn't really eat kale until a couple years ago, so I think I'm making up for lost time. Plus it's seriously delicious. I like it raw, cooked, as a spread, in soup, growing in the garden, as a chip, in smoothies, & everywhere in between!


Last night, we had our kale in the form of a huge salad paired with Jenna's Spicy Black Bean Burgers. These are one of our go-to bean burgers because they're super yummy & easy to throw together.


The salad is fresh & bright, with lots of flavor. I love the creaminess that the avocado gives to it. Avocadoes are full of healthy fats, & in this case, it adds some bulk to an otherwise fairly light salad.

I brought kale salad to the Bup's family Christmas dinner & to my family Easter dinner. Both versions had variations of this dressing, but I felt like it needed a few tweaks to be just perfect. The recipe below is that I've decided is the best of the bunch.

If you've never had a kale salad, here are a few tips:

1. Unlike lettuce salads, you can dress it ahead of time & it will only get better. The flavors marinate & the kale softens slightly, making it easier to chew.

2. You have to commit to getting your hands in there & massaging the kale. There's really no better way to get the dressing spread evenly & to soften the kale leaves. Just be prepared - if you have even the slightest knick in your skin, it will burn from the lemon juice!

3. Kale is a chewier green than lettuce, so it's not a traditional salad. It is, however, extra full of flavor & health benefits!

Enjoy!


Vibrant Lemon & Avocado Kale Salad
Dressing inspired by Tracy
Serves 2-4

1 bunch kale, stems removed & torn into pieces
1 avocado, cubed
1/2 small onion, sliced
1 apple, chopped

Dressing:
Juice of 1 lemon
1/4 tsp. salt
1/4 tsp. black pepper
1/4 tsp. garlic powder
1 T Dijon mustard
1 T extra virgin olive oil
2 T nutritional yeast
1 tsp. honey or maple syrup

In a small bowl, whisk together the dressing ingredients. Combine kale & dressing in a large bowl. Massage with your hands (wash them first!) until the kale softens & turns a dark, shiny green. Add avocado cubes, onion slices, & apple. Toss to mix & serve.

Note: Salad can be made ahead of time. Once dressed, just cover & place in the fridge until time to serve. Flavors will develop as it marinates.

February 18, 2012

Chewy Cherry Granola


 Last week I ordered chia seeds from Chiaseedsdirect.com. A few days later, 4 pounds of chia arrived on my door step. I don't think I fully comprehended how many chia seeds I was ordering until I opened that box.

For those of you who only think of chia seeds as what you plant on a chia pet, guess what! You can eat them! Chia seeds are extremely healthy - check out these stats! They have healthy omega-3 fatty acids, complete protein, & lots of B vitamins. They don't have a strong flavor, which makes them versatile in cooking & baking.

One thing to note - when chia seeds come in contact with liquid, they form a gel. This makes them perfect for chia eggs, but also means that in most baked goods they will absorb moisture & thicken the batter.


So now, lucky for all of you, I'm on a kick to find ways to use all 4 pounds
I'm not really into chia pudding, although I've only tried pumpkin & I think chocolate would probably rock.

I love adding chia seeds to my oatmeal, but at 1 Tablespoon a day, 4 pounds worth will be rancid before I make it through 1 pound.

Of course, I could freeze some, but that would defeat goal #2 for 2012. I think I still will freeze 2 pounds, but for the rest, it's time to start being creative!


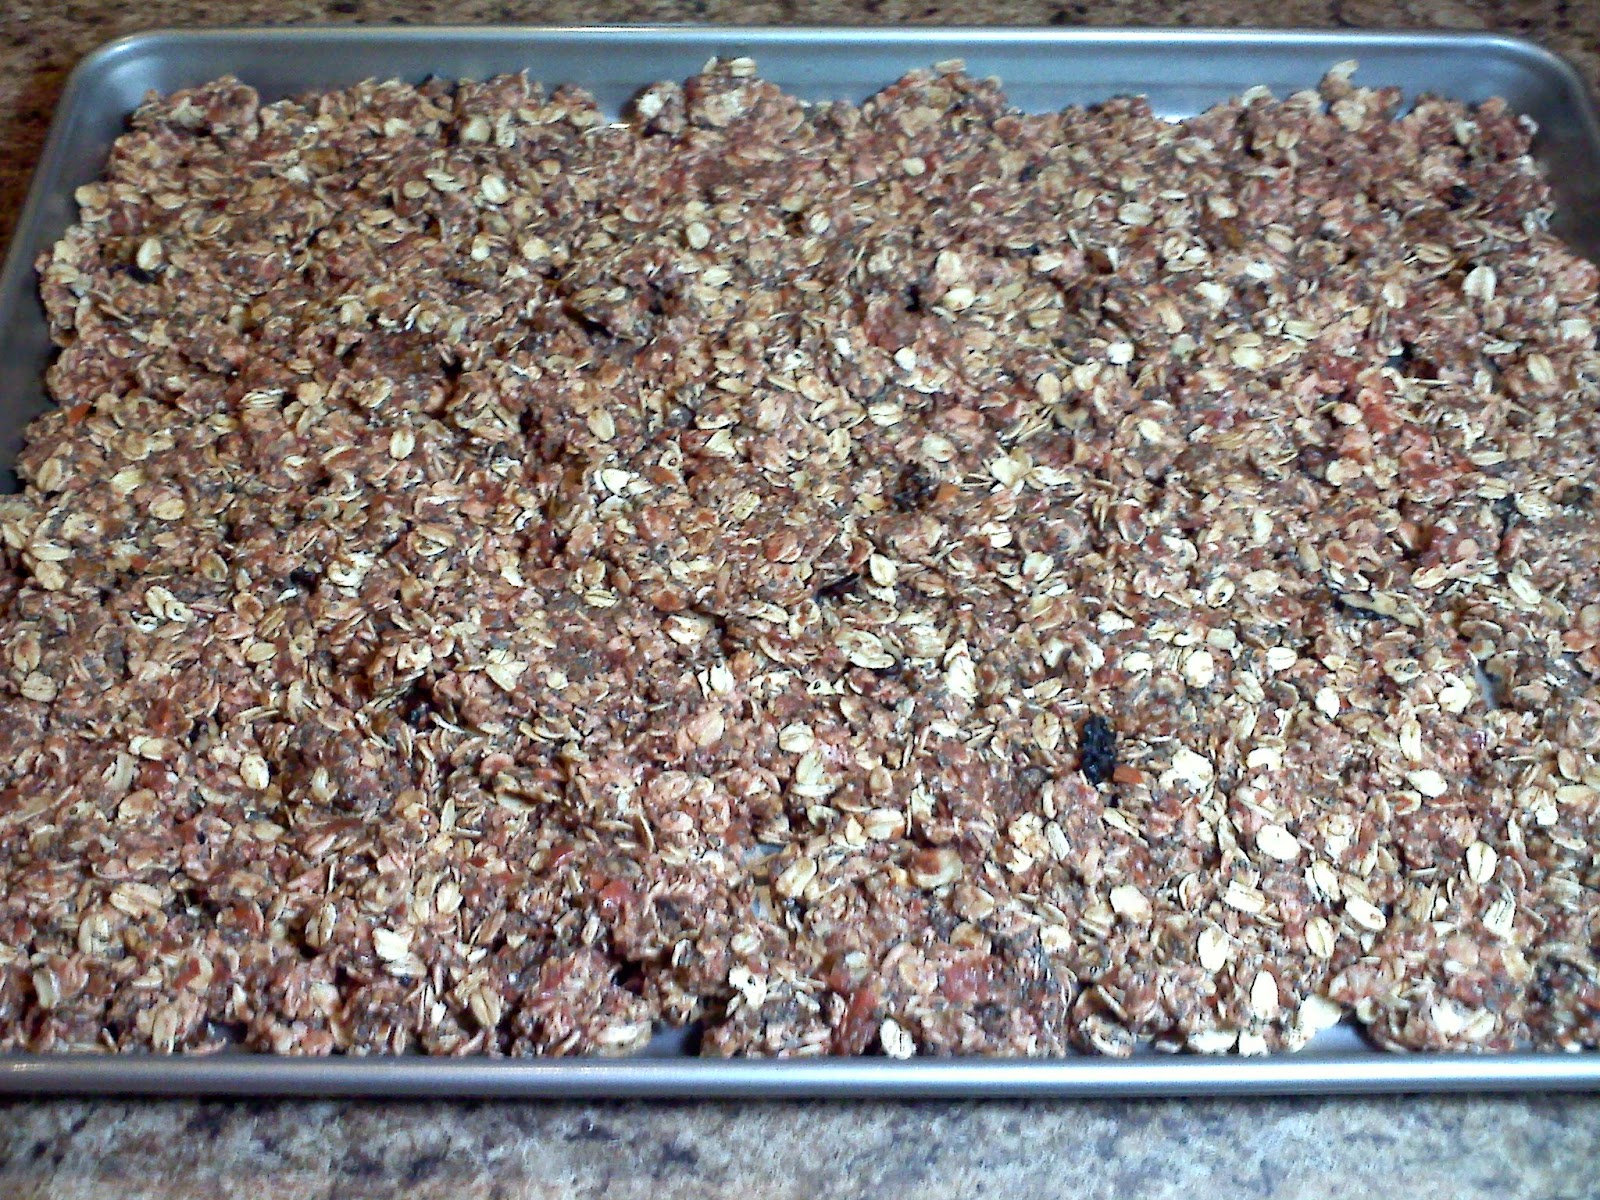
All that, just for some simple granola.

This recipe is filled with nutrients including plenty of omega-3's, fiber, & antioxidants. It's low in fat unlike many granolas (and the fat it does have is healthy fat!). It's also low in sugar. Most of the sweetness comes from the cherry puree, the rest from a spot of honey, both of which are natural sugars & have plenty of nutrients.

If you don't like nuts or are allergic, feel free to eliminate them. We have lots of walnuts, so that's what I used, but I think almonds or hazelnuts would be delicious, too. It would be great without nuts, too.

And for those of you who didn't just purchase 4 pounds of chia seeds, feel free to add some extra oats, flax or wheat germ to compensate. It'll still be good, I promise.


Chewy Cherry Granola
Adapted from How Sweet It Is
Yield: 6-7 cups

4 c old-fashioned oats
1/4 c ground flaxseed
1/4 c wheat germ
1/2 c chia seeds
1/2 c chopped walnuts (or other nuts)
1/4 tsp salt
1 tsp cinnamon
3 T honey
2 T coconut oil, melted (or substitute canola oil)
1 T vanilla extract
2 c cherry puree (about 1 lb of cherries, fresh or frozen)
1/2 c dried cherries
1/2 c coconut flakes (optional)

Preheat oven to 325 degrees. Combine oats, wheat germ, flax, salt, cinnamon & walnuts in a large mixing bowl. Using a food processor, blend pitted cherries until pureed. Stir in coconut oil & vanilla. Add the honey to the oat mixture. Once combined, stir in cherry puree mixture.  Make sure everything is evenly coated. Spread in an even layer on a large baking sheet (or use 2 baking sheets, depending on size). Bake for 30-35 minutes, stirring every 7-8 minutes. Granola should be slightly golden when it is done. As granola cools, it will become slightly crunchy. If you prefer your granola to be very crunchy, bake it for about 10 minutes longer.  Fold in dried cherries and coconut flakes. Store in a sealed container for 1-2 weeks.

January 17, 2012

Cracking Walnuts


 It might not show too much on the blog, but we eat a lot of walnuts. I'm surprised we haven't lost any teeth yet, because inevitably there's always a shell mixed in. I can't complain too much, though, because I have a great source of free, already picked, walnuts.

My grandparents have walnut trees on their farm & they are always sharing them. Lucky for me, Mom & Dad pick them before they pass some on to me. :-) The contraption above is what Dad uses to crack the walnut shell before picking out the meat.


It's very easy to use & much easier for mass cracking than the hand crackers used for individual eating. Still, it's not a perfect system, so sometimes chunks of the shell find their way into the wrong pile. We always know to chew carefully when our food contains walnuts!


Walnuts grow on trees in big green balls. Inside the green ball is the hard brown shell that we're used to seeing. Once you crack the brown shell, the nut-meat inside is edible. It's amazing how the tree protects its seeds so well!

Both black & English walnuts grow the same way. English walnuts are more commonly found in stores & have a milder flavor. Black walnuts are earthier in taste & have a harder shell. Poppop grows both, but he has more black walnut trees so that's what we usually eat.

File:Black Walnut nut and leave detail.JPG

Seeds are the life line for the tree, so naturally walnuts are chock full of healthy nutrients. They're also a great source of omega-3 fatty acids, which are essential to our health.

Walnuts have been proven to aid in the health of the cardiovascular system, especially the heart. Another great reason to eat walnuts is their antioxidant & anti-inflammatory properites that provide anti-cancer benefits.


Some of my favorite walnut recipes:

Fig & Walnut Biscotti from Michelle


Walnut recipes I think look delicious:


December 31, 2011

Red Cabbage & Pear Salad with Mango Dressing


I can hardly believe it's almost 2012! Every time I stop to think about it, I'm in shock. Really, it makes me feel old...3 years married, home-owning, closing in on the 5 year college reunion mark OLD.

But that's a good thing. I'm happy with what I've done so far in my life & I look forward to the upcoming years with anticipation of what's to come.

The surest way to make sure my hubby & I have a chance at enjoying a long life together is to feed us well. Incorporating lots of nutrient dense foods into our life will give us energy to handle whatever 2012 & beyond throws at us. I'm ready!


I'm not planning any big new year's resolutions. My main goal is to empty the freezer because it's in dire need of a defrosting. That might not sound too hard, but I have (happily!!) a major grocery shopping problem. So the hard part of emptying the freezer is that I have to stop buying more food. I'm aiming for a defrost in late March. We'll see...maybe by then I can put the contents outside to stay cold while it defrosts? 

This salad was inspired by a jar of Trader Joe's mango butter, a chunk of red cabbage, & some overly ripe pears that were sitting in my fridge. When I googled ways to combine red cabbage & pears, many of the recipes included sliced mango, giving me the idea to use that flavor in the dressing. If you don't have access to a Trader Joe's & can't find mango butter elsewhere, I'm sure you could use apple or pear butter in it's place & add mango slices.

Red Cabbage & Pear Salad with Mango Dressing
Serves 6-8

1/2 head of red cabbage, shredded
1 carrot, grated
1/4 of a large red onion, sliced
1 pear, chopped
1/3 cup apple cider vinegar
2 T extra virgin olive oil
3 T mango butter*
1/4 tsp. sea salt

Combine cabbage, carrot, onion, & pear in a large bowl. Whisk together vinegar, olive oil, mango butter & sea salt. Pour dressing over the salad. Stir & allow to marinate for 30 minutes before serving.

*Feel free to substitute apple or pear butter if you can't find mango butter. If you still want the mango flavor, add a few slices to the salad.

November 20, 2011

Apple Pumpkin Beer Bread


Fall is slowly winding down. Daylight savings has come & gone, so now it's dark in both the morning & evening. This makes me want to curl up on the couch with a blanket & a mug of hot tea every.single.night. Not good. Especially when things like meetings & life get in the way.

You're probably ready for me to let go of fall, since I've been talking about it for months now, but I'm trying to hang on a little big longer.

This bread, with its fall flavors of pumpkin, apple, & spices helped just a bit. It's sweet enough to be dessert, but healthy enough for breakfast. Or as a mid-day snack to tide me over until dinner.


Start by mixing up the dry stuff, complete with lots of warming spices! Depending on how spiced the pumpkin beer you use is, you may want to reduce or increase the spices. I used Post Road Pumpkin Ale, which is slightly spiced but not over the top.


Chop up the apples & stir together the wet ingredients. There will be leftover beer, but don't worry about that. I'm sure you'll find a good place for it. ;-)


Pour the wet ingredients in with the dry and mix away.


Then add the apple chunks, stirring just until they're combined. Don't over stir.


Pour the batter into a loaf pan. I put a baking sheet under my loaf pan while baking, just in case, and it did catch a few drippings of batter. I wanted a nice big loaf, so I didn't want to cut back on the ingredients, but I also didn't want to have to clean the oven!


Once it cools, you can slice it up & enjoy!

The chunks of apple cooked into little pockets of sweetness, complimenting the spiced bread. Each bite has all the fall flavors, kicked up a notch with the slight hint of beer. I hope you enjoy it!


Apple Pumpkin Beer Bread
Yield: 12 slices

2 1/2 c white whole wheat flour
1/4 c ground flax
1/4 c toasted wheat germ
2 tsp. baking powder
2 tsp. baking soda
1 tsp. salt
2 tsp. cinnamon
1 tsp. ginger
pinch nutmeg
2 c chopped apples
1/4 c coconut oil, melted
1/2 c pumpkin puree
3/4 c agave nectar or maple syrup
3/4 c pumpkin beer
1 T vanilla

Preheat oven to 350*F. Spray a glass loaf pan with cooking spray. In a large bowl, combine white whole wheat flour, flax, wheat germ, baking powder, baking soda, salt, cinnamon, ginger and nutmeg.  In a separate bowl, mix together coconut oil, pumpkin, agave nectar, pumpkin beer and vanilla. Add wet ingredients to dry and stir until no dry ingredients remain. Add apples and stir just until combined. Pour into prepared loaf pan. Bake for 55-65 minutes or until a toothpick inserted in the middle comes out clean. Cook in pan 10 minutes. Invert onto a cooling rack and cool completely before slicing.


October 18, 2011

Champagne Roasted Cauliflower


Our dinner tonight was pretty small. I was too busy making cupcakes to bring to work tomorrow.

It may have been small, but it was delicious!


I was recently selected to be part of a Foodbuzz Tastemaker program with Marzetti Simply Dressed. We don't generally use bottled dressings, preferring instead to make our own, but this dressing was delicious!

They have a nice variety of flavors available, ranging from Ranch to Champagne to Ginger Sesame. I'm very picky (who me??) about ingredient lists, so when I saw that their Simply Dressed line uses minimal ingredients, all of which I can pronounce and recognize, I was happy to try it.


I used a gorgeous mixture of purple & orange cauliflower. Any variety will work here, I just like the fun colors. You can use both the florets and parts of the stem, as long as all the pieces are of uniform size.

After roasting, it gets all caramelized and delicious. This would work with any veggie, but would be especially good on Brussels sprouts, aka roasted deliciousness. We like our veggies roasted no matter what seasoning is on them.

The dressing is an added bonus. And a very tasty one, too!


Champagne Roasted Cauliflower
Serves 2 as a main dish or 4 as a side


1 head of cauliflower
1 large onion
3 T Marzetti Simply Dressed Champagne Dressing

Preheat oven to 400*F. Spray a large baking sheet with olive oil spray. Wash and chop cauliflower florets & stem into 1" pieces. Chop onion into similar sized chunks. Toss together with dressing. Spread in an even layer on the baking sheet. Bake for 20 minutes, then stir. Bake another 20 minutes. Depending on the size of the baking sheet, the cauliflower may need more time. Check every 5 minutes after the first 40 minutes, being careful not to let it burn. The cauliflower pieces should be slightly browned and starting to crisp.

Enjoy!

August 21, 2011

Kale Chip Tips


If you've never eaten kale before, my Dad will tell you that you're lucky. But deep down, he loves it.

If you've never eaten kale before, I will tell you that I'm very sorry for you. Go eat some.


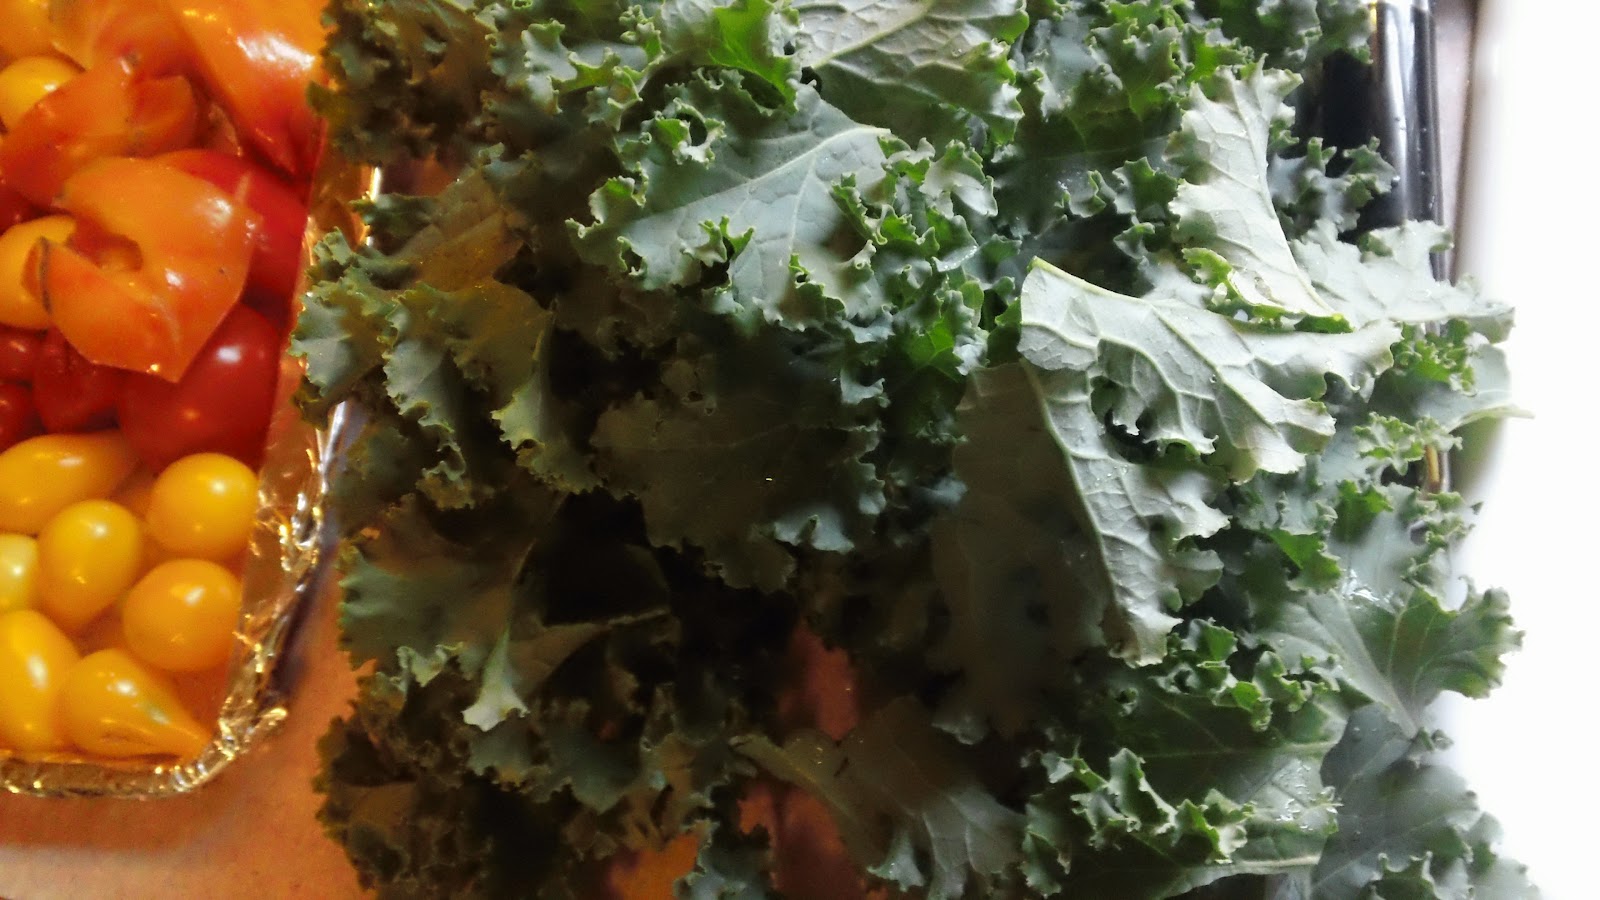
Look at it! Crazy curly leaves, pretty blue-green color...what's not to love?


Our favorite thing to make with kale is kale chips. In the winter, when I'm buying kale, I try to ration it. One big bunch = 3 times of eating kale chips. That's sad. Right now, I cut as many big leaves as fit into my garden basket and squeeze them all onto a tray, or two trays if I get crazy with picking it.

There are a lot of recipes on the web for kale chips, so this is not an original idea. It's just a really great one. I'll post our method here, because we (and by that I mean the Bup) have figured out some tips and tricks. He's the master of kale chips. I almost always burn them because I'm busy doing other stuff.


See? Squeezed. Spilling over the edges. Delicious bites of green.


Look how much it cooks down! This is why it's okay to squeeze it on there. The more the better.


When they're done, they should look about like this. Not brown, but less blue than before. The biggest test is to just pick up a piece and see if it's crispy. If not, put them back in for 1 minute and check again.

Do not, under any circumstances, put them back in for longer than 1 minute when they're just about done. You'll be sorry.


Ignore the chipped nail polish & focus on the chipped kale. It's crispy but not burnt & has a little crystal of sea salt on the edge.

It didn't last long after I snapped the picture. 


Bonus for all of you protein lovers out there - kale has protein! Check out The Stone Soup for several other surprise sources of protein.

Kale Chips
Serves 2
Bup's tips are in blue.

1 large bunch of organic kale
olive oil spray
~1/2 tsp sea salt crystals

Preheat oven to 400*. Lightly (VERY lightly) spray a baking sheet with olive oil spray (4 quick passes usually does it). Wash kale and shake dry. Rip leaves away from stem into large pieces. Reserve any small pieces for other use* & discard stems. Lay leaves on tray in a single layer, pushing together as closely as possible ( I usually fold them in half and set just the edges on the tray. You want as little of the piece of kale to be touching the tray as possible, but each leaf does need to touch the tray. Don't pile them up). Very lightly spray leaves (Too much spray will cause them to wilt. Use even less than you used on the pan.) & then sprinkle with sea salt. Go light on the salt - a little goes a long way. Bake for 5 minutes and then check leaves. If the leaves are laying flat on the tray or are brown in color, flip them with a spatula (This is caused when there is too much oil or they were laid flat on the oil). Otherwise just shake the tray to make sure they're not sticking. Return to oven for 1 minute and check again. If the leaves are still limp, it needs another minute. If the leaves are crisp, they are done. Remove from oven and eat. (Try not to be sad when they're all gone!)


*Green smoothies!!! Post coming soon.

August 10, 2011

Rossetti's Italian Vinaigrette


This is the ultimate salad dressing. The one we use almost daily. It gets requested by my grandparents and several friends, too.

My Grandma Rossetti always hand-dressed her salad. Literally. She'd add the ingredients and then stick her hands in there and mix. Personally, I don't want anyone questioning whether my hands were clean before I handled their lettuce and I don't like getting my hands greasy, so I use a spoon & fork. You can take your pick.

Dad tweaked Grandma's recipe a little, and then Mom tweaked his. She didn't change the flavor, just started using a measuring spoon, mostly to get him to use less ingredients. They were ending up with soggy lettuce and lots of leftover dressing in the bottom of the bowl. No one wants either of those!

The best part about this dressing is that you can measure the ingredients right on top of the lettuce & veggies and mix. No extra bowl necessary.

Added health bonus: vinegar has been known to be a great digestive aid and has a lot of health benefits. This dressing has plenty of vinegar. We always eat our salads after dinner and I really think it works! It's also light on the oil, so it is naturally "light." Olive oil is a healthy fat that helps the body absorb the nutrients from the vegetables.


Rossetti's Italian Vinaigrette
For 1 large salad

1/4 tsp black pepper
1/4 tsp dried oregano
1/4 tsp granulated garlic (or garlic powder)
1/4 tsp salt
1 T extra virgin first press olive oil, organic
1 T balsamic vinegar
2 T red wine vinegar

Prepare salad. Sprinkle dry ingredients one at a time onto the salad. (Don't dump them in a little heap! Sprinkle!) Do the same with the wet ingredients. I usually use the salad spoon in lieu of a tablespoon, and it works fine. The main thing is to have the ratio correct and not to add too much liquid. You can always go back and add more if needed. Toss salad well, making sure you don't see any clumps of dry ingredients. Add more vinegar if it is too dry.

Note: It's best to wait until right before dinner is ready to dress the salad. This keeps it nice and crisp.

Rossetti's Italian Vinaigrette

July 28, 2011

Tower of Chard


This is what happens when you let your structurally inclined hubby chop the veggies for a make your own pizza party.


You wind up with a tower of chard.

It was my fault we had so much swiss chard to begin with. I went a little crazy in the garden because the crop is out of hand. Aside from the chard, we had white & red onions, tomatoes (some of the first from the garden!), a baby pattypan squash, and the choice of basil almond pesto, bbq sauce, or tomato sauce.

The other three ended up making strombolis and I had a pizza. This is why make your own pizza parties are so perfect. We all got a unique dinner and had fun making it together.


I got two questions in one comment in my last post to answer!


First off, a flax egg is indeed not an egg at all. It's one of the many substitutes for an egg that is used primarily by vegan bakers. I use it occasionally for a few reasons:
  • I want my food to be vegan
  • I want to be able to eat the cookie dough w/o consuming raw egg
  • I'm out of eggs and can't get any farm fresh ones right away
  • Flax has a lot of health benefits, including omega-3 essential fatty acids, which are important to consume. Americans in general consume far too many omega-6's and not nearly enough omega-3's, which throws off the proper ratio between the two. Omega-3's are commonly found in fish, but flax, chia seeds, and walnuts are all excellent sources in a vegetarian diet.


Second question: How do I store my homemade bread? ?

Usually in a plastic bag.

If the recipe I'm using makes 2 loaves, I"ll double bag one and freeze it. The remaining loaf is stored in one bag, with a little room to breath. I bought a nice bread loaf sized storage container that made every loaf grow mold quickly because it was so air tight. It's now pushed far into the back corner of my cabinet. I like to loosely twist the bag closed (or zip it most of the way, depending which type of bag I'm using) and tuck the end under the loaf. This method works for us due to the temperature in our kitchen (65-77 degrees, depending on the season) and the speed at which we eat the homemade bread.

I hope this was a good enough answer! 

Please continue to comment and I'll try to answer everyone's questions!

I'm heading to Pittsburgh for the weekend for my cousin's wedding. More posts when I return!

January 4, 2011

Coconuts!

I've been reading a lot lately about coconuts and how nutritious they are. I used to only like coconut in the form of coconut LifeSavers. You know, the white ones that don't really taste very coconutty at all? It was a Christmas tradition to receive a box of 8 rolls of LifeSavers complete with a mini story book from Poppop, so there always seemed to be a roll laying around somewhere. I no longer really like LifeSavers, but I do like coconut! Part of the problem for me is the texture. People were always trying to ruin a perfectly good dessert by sprinkling it with coconut. Anyway, after all my reading, I've found that coconut is one of the top most nutritious foods and the oil is a very nutritious fat. It got a lot of bad publicity when all the vegetable oils started being manufactured, but don't let that fool you!


So I bought 2 jars and decided to start using it. It smells like coconut (yum!) but doesn't make the food taste like it. It's solid at room temperature which makes it tricky to substitute it for liquid oils in baked goods (although you can melt it in the microwave) but it works well for stir fries. And carmelized onions. Mmmmm... 


Cold-pressed oils are also more healthy for you, so if you go out to buy this, or any oil, buy cold-pressed. The nutrients in oil are lessened when it is heated and processed.


It seems like ever since I started learning about the health benefits of coconut it's showing up everywhere! I bought a bag of the unsweetened finely shredded organic variety and have been adding it to my oatmeal. It's a good way to trick my texture sensations because it's chewy and mixes into the oatmeal well so I don't get that stringy feeling.

This morning in my email box I got a blog update about making your own coconut milk. I may have to try it! 


I did add the coconut oil to my Doughnut Muffins yesterday with great results.

We've already eaten 2 each!


Related Posts Plugin for WordPress, Blogger...