
I love pumpkin puree.

Remember that HUGE pumpkin we grew last year? Over 30 pounds?!

Seriously huge.

It didn't even fully ripen because the frost hit long before it had time to finish growing. I can't imagine the size if it had more time!

Even the chunks of it dwarfed my cutting board and even the toaster oven!

It broke our blender.

We got a new one for the second half.

Seriously a ton of pumpkin.
Well, this year, no random pumpkin vine started growing and by the time I thought to plant one it was too late.
Luckily, they're selling them at the market. I got one for $1 that weighed 8.4 pounds!
Since I love pumpkin so much, one of the most important things that I do in the fall is bake, puree, and freeze pumpkin. That way I have it ready to go all winter long.

Step 1: Buy a really huge pumpkin.
The bigger, the better. Once you get rolling, it's easiest to do it all at once. If you can't find a big pumpkin, use 2 smaller ones. I don't really like messes, so the less times I go through this process the better!
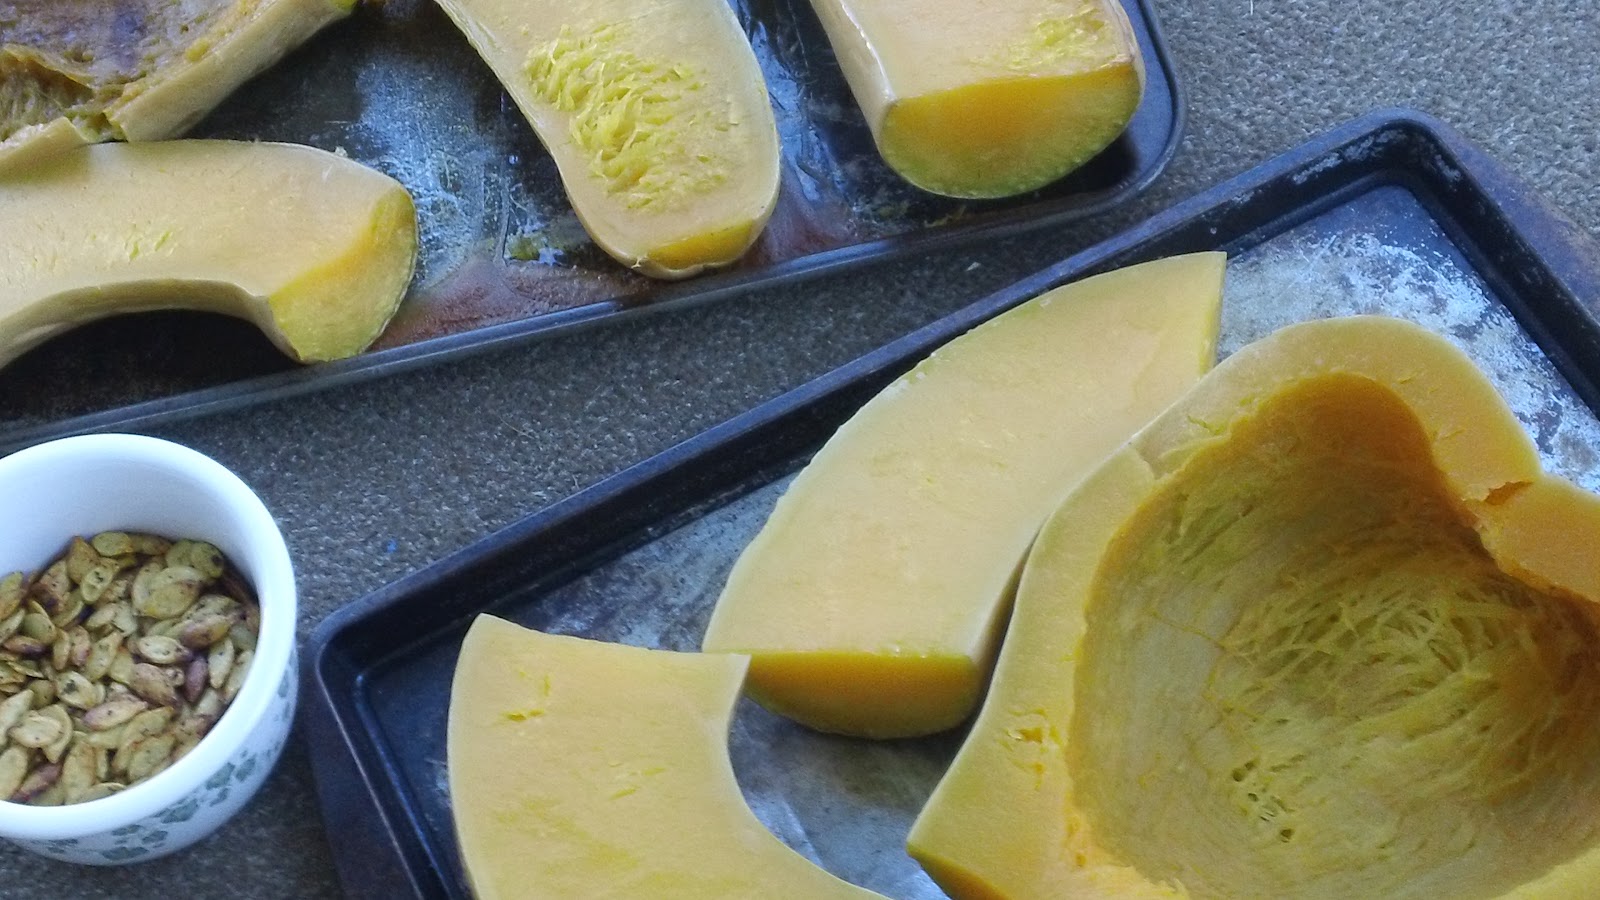
Step 2: Cut it in big chunks.
Preheat your oven to 375 before you start chopping. I usually chop the neck part into at least 4 chunks and then the round part in half. You will need a very sharp knife. Use carefully!
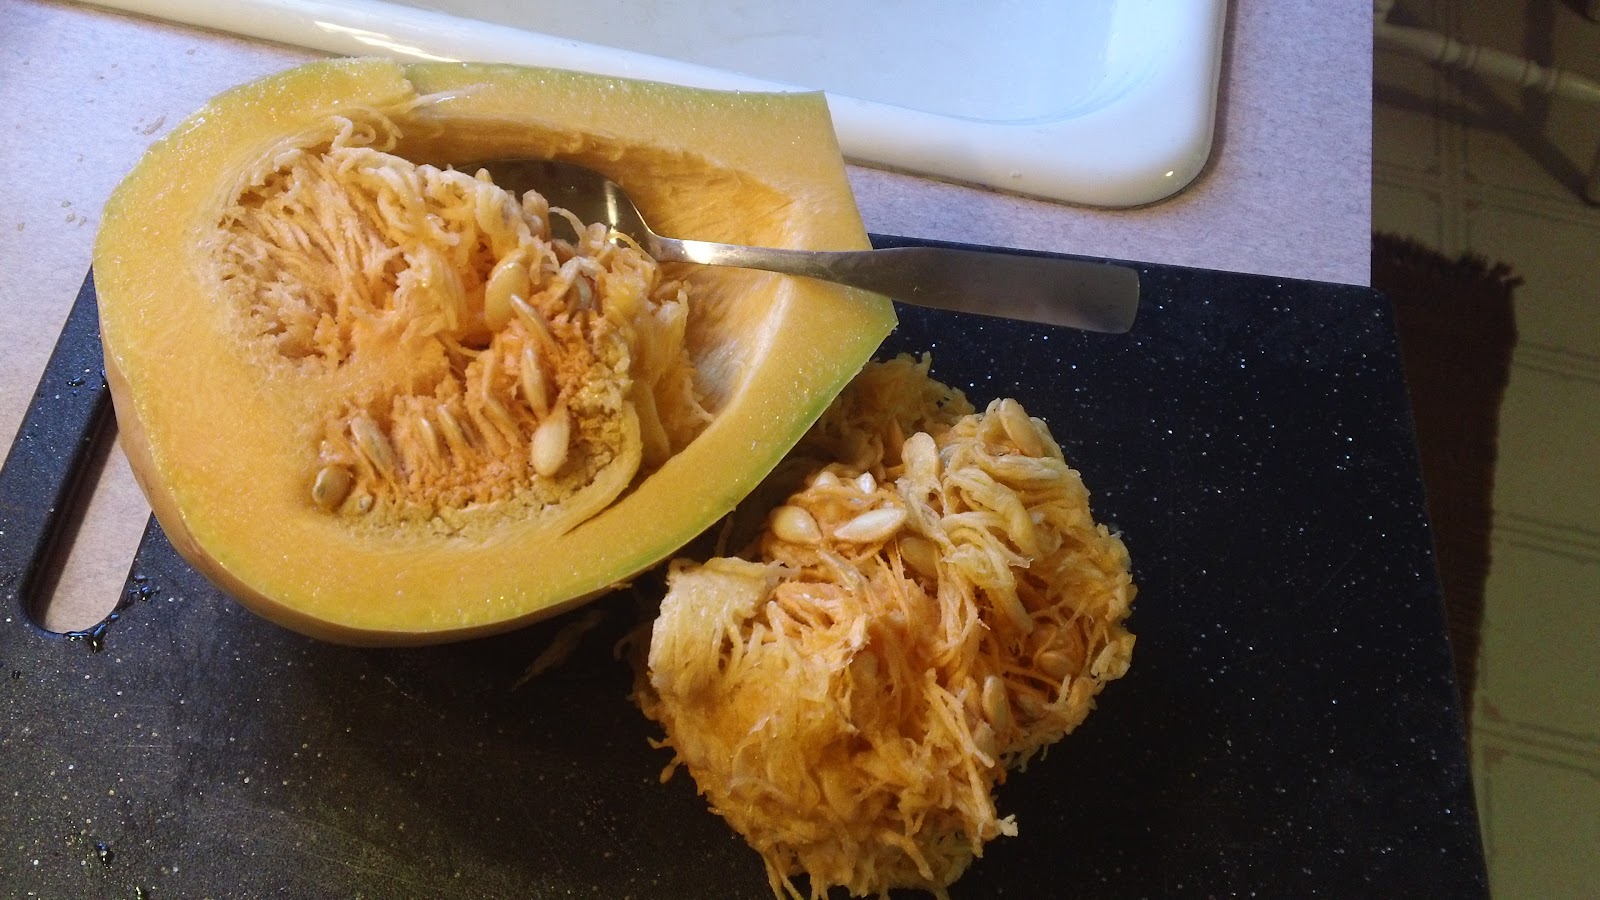
Step 3: Remove seeds & pulp.
The easiest way to remove all the goop is with a metal spoon. It's not sharp, but it scrapes the stuff out well. Reserve the pulp for Step 6.

Step 4: Place chunks face down on baking sheets.
Using as many baking sheets as necessary, lay the pumpkin chunks with the insides down on the sheets. There's no need to grease the sheets.
Step 5: Put in oven and pour water onto baking sheets.
Put the baking sheets in the oven before adding water to them! I always make a mess otherwise. Once they are in the oven, carefully pour enough water over them to cover the bottom of the sheet with about 1/4" of water. Let bake for 40-45 minutes or until soft. You can check doneness by poking through the skin of the thickest chunk with a fork. If the fork slides in easily, they're done.
Step 6: Clean seeds.
Time to get messy! This step is optional but worth it cause you can eat the results right away. Sort through the pulp (it's easiest to use your hands) to remove all the seeds. Discard the pulp. Rinse seeds and dry with a towel.

Step 7: Season and bake seeds.
Season the seeds however you wish. I used salt and pepper this time, but we like curry powder a lot, too. Lay seeds flat on a greased baking sheet or pie pan. Bake for about 20 minutes, stirring frequently. They are done when they are lightly browned and crisp.

Step 8: Let pumpkin cool.
Remove pumpkin from the oven, being careful not to spill any water that may remain on the baking sheets. Set aside to cool for about an hour. I always try to work with it too quickly and burn myself. Don't do that.
Step 9: Remove outer skin.
Using either your hands or a spoon, scrape the cooked pumpkin off of the outer skin. Discard skins.
Step 10: Puree in food processor/blender.
Working in batches, put cooked pumpkin into a food processor or blender. Process until smooth and creamy.

Step 11: Divide and freeze or use.
I usually freeze my puree in 1.5-2 cup batches. Most recipes call for anywhere between .5-1.5 cups of pumpkin, and I like to have leftovers for things like pumpkin oatmeal and pumpkin drinks.
Some yummy things to make with your pumpkin puree:
0 comments:
Post a Comment